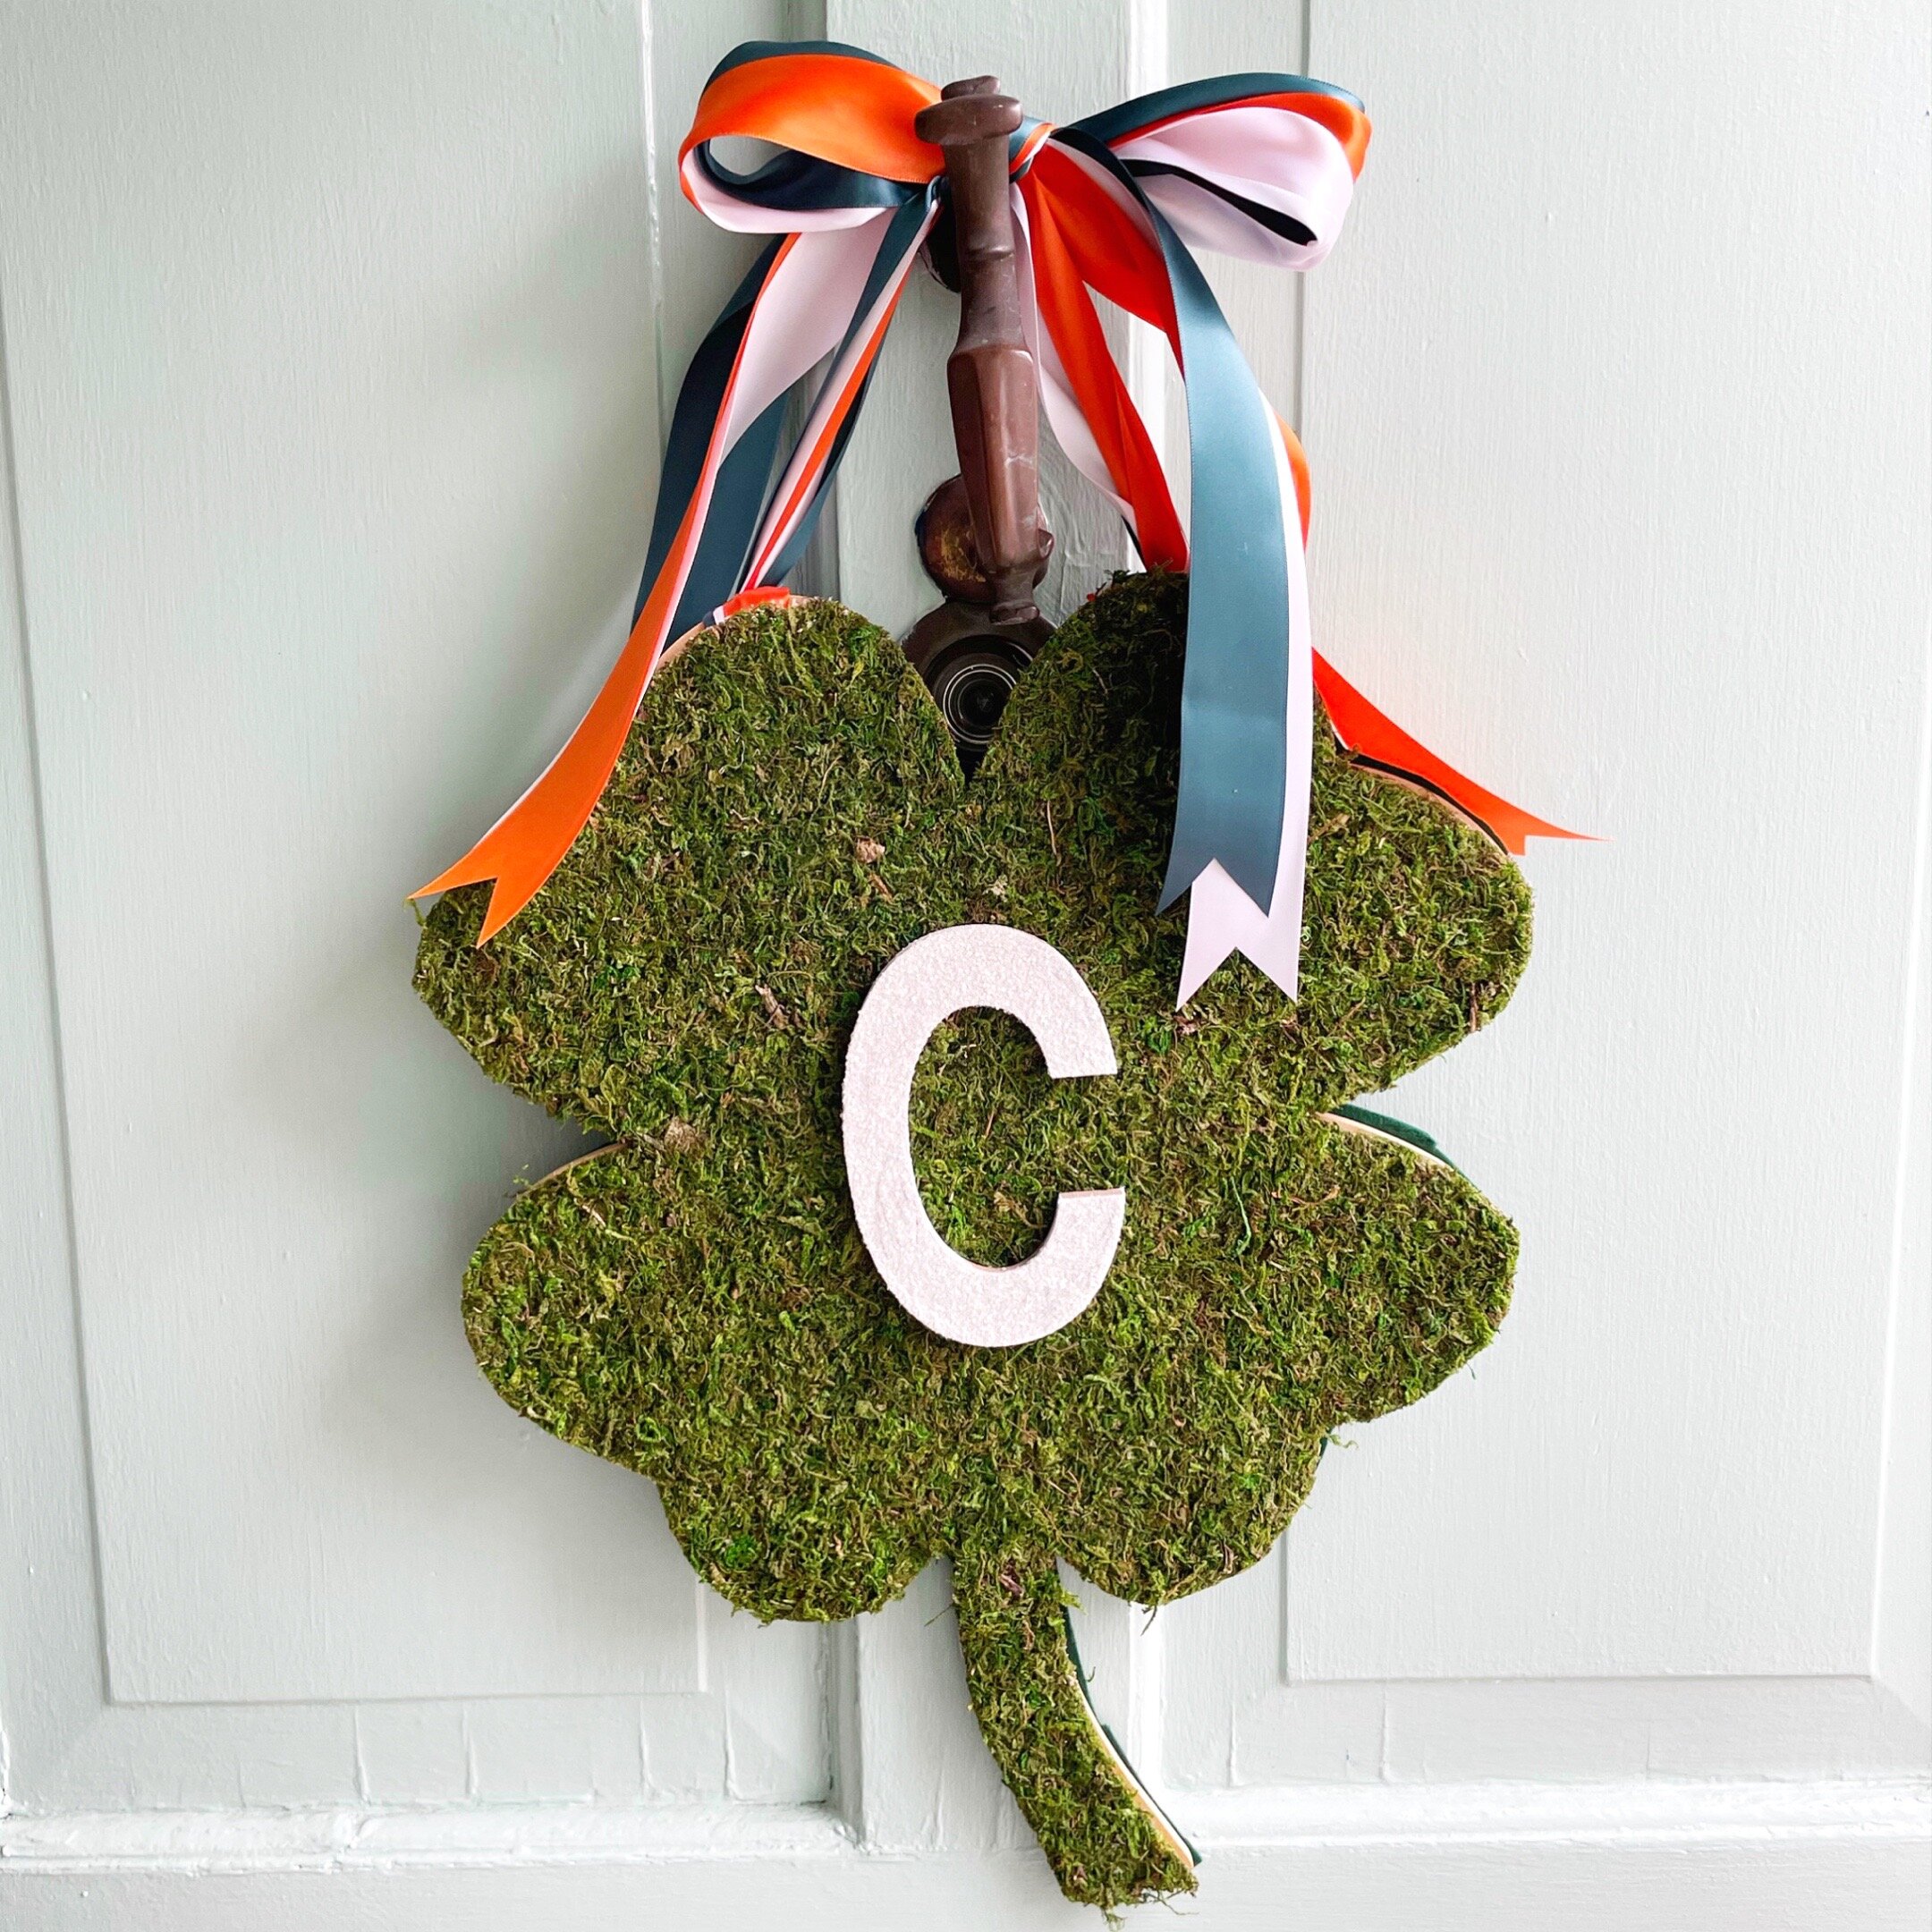
Show a little Leprechaun spirit with this fun shamrock door charm!
Mise en place:
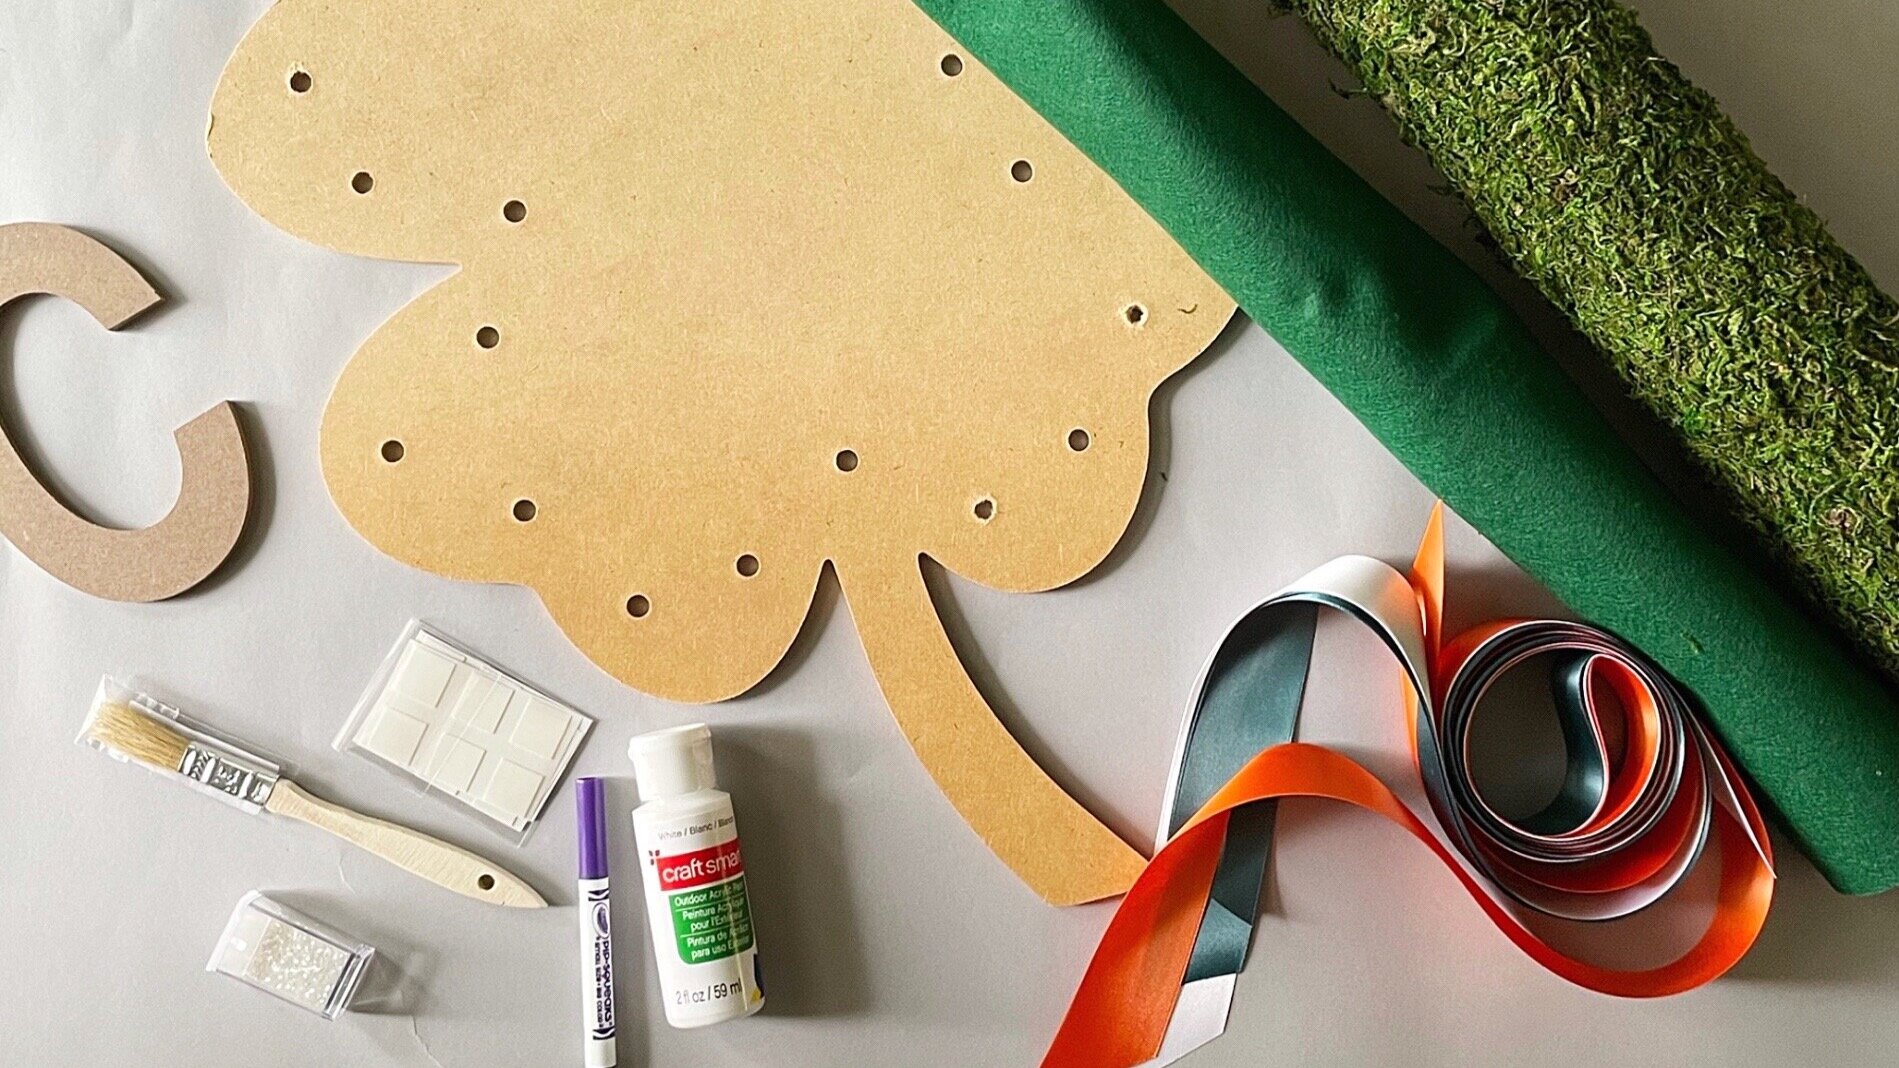
Shamrock wood form
Initial wood form
Felt
Moss on a roll
Ribbon
Marker
Paint
Paintbrush
Glitter
Glue Dots
Not included in kit:
Scissors
Glue Gun or Spray Glue (optional)
Paper plate
Small plastic cup or cupcake foil
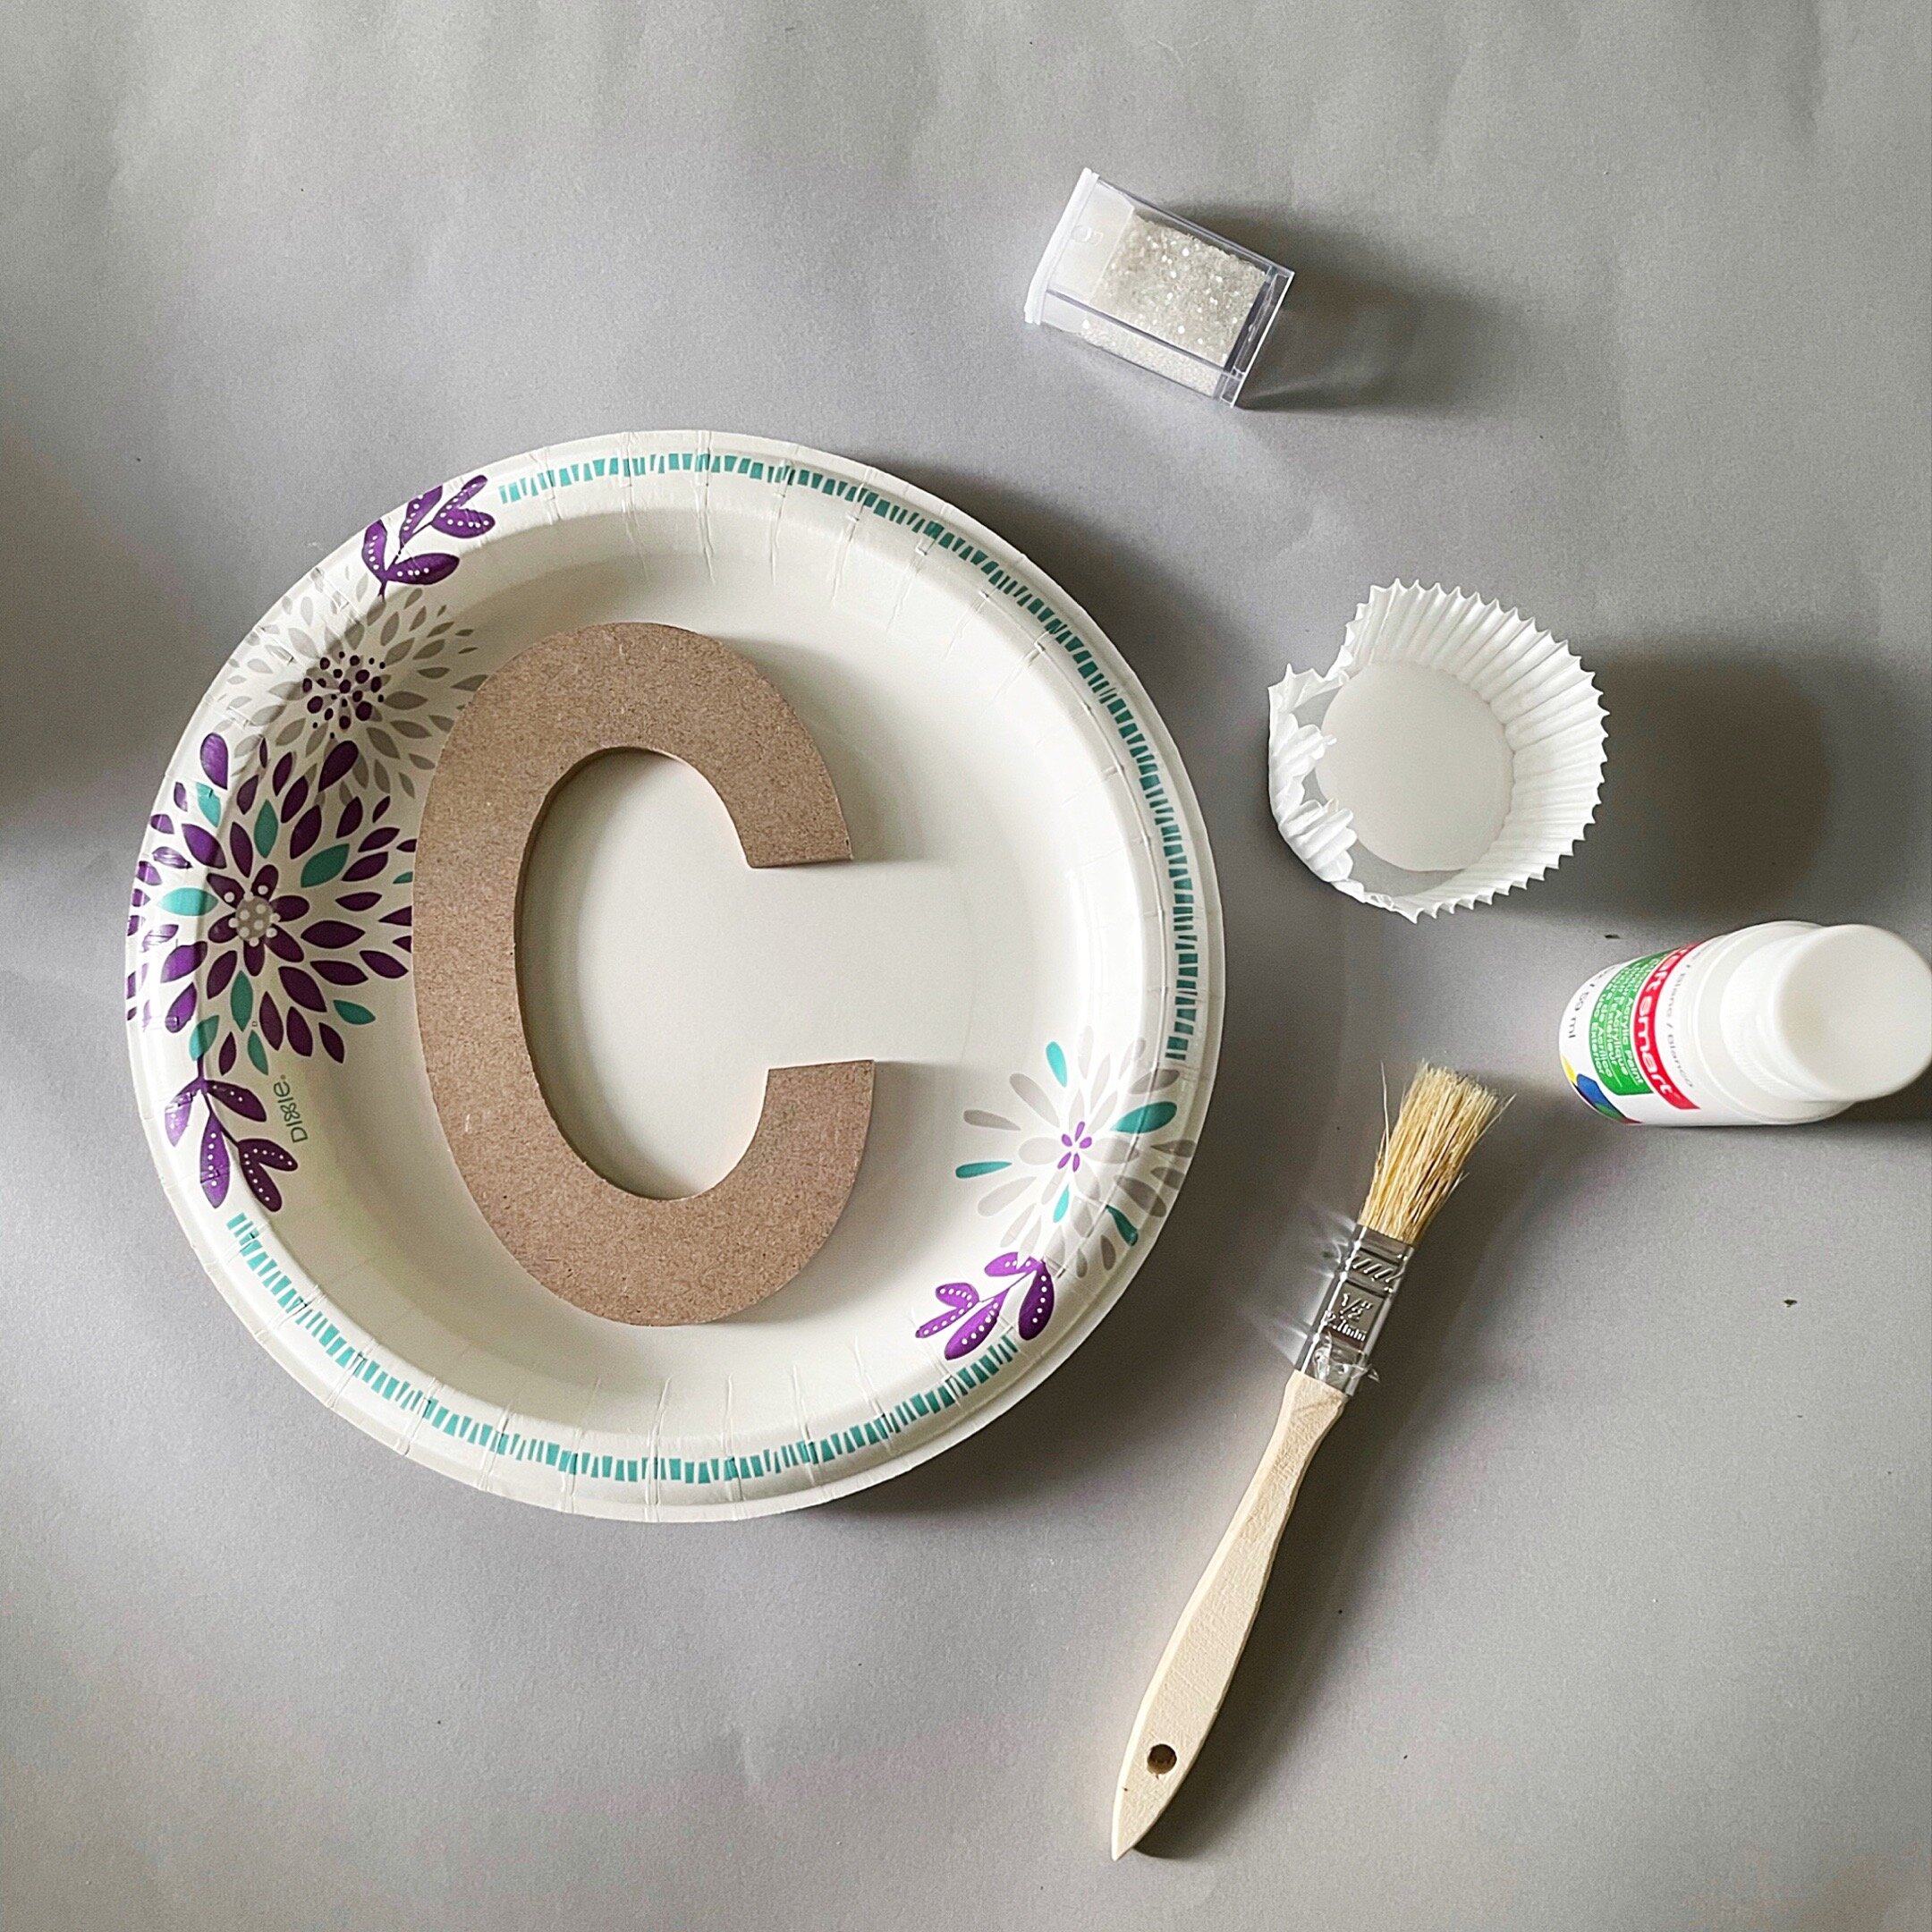
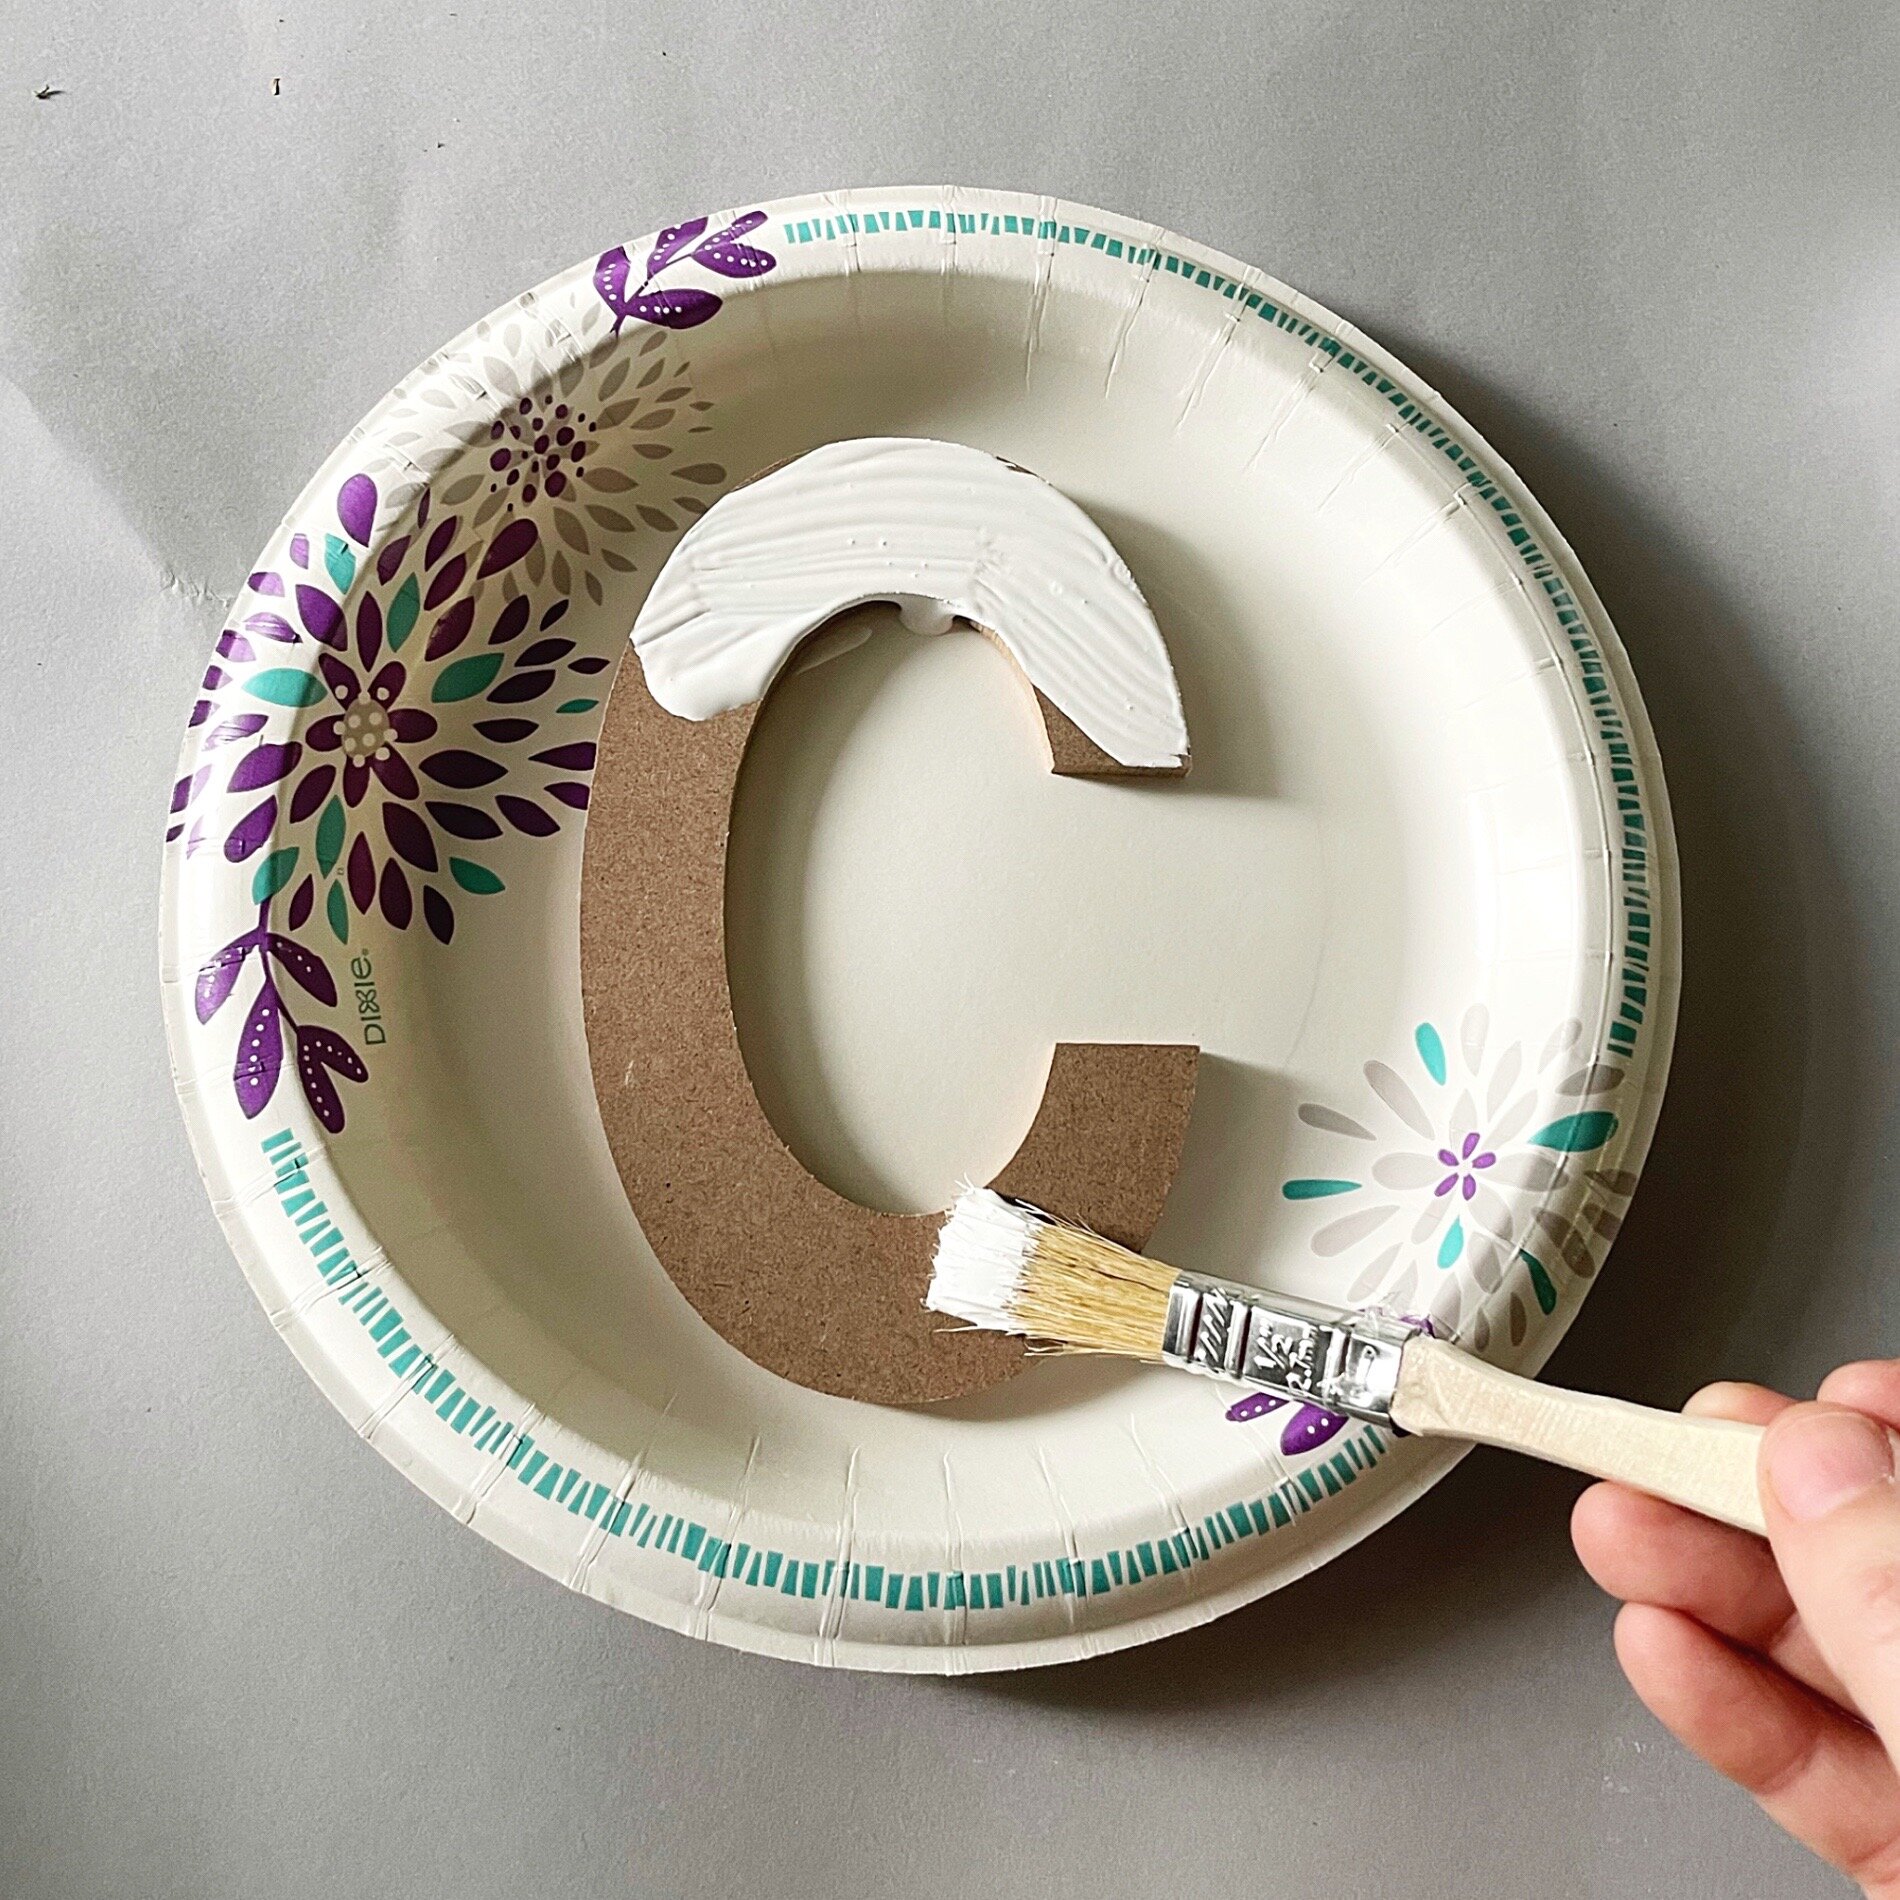
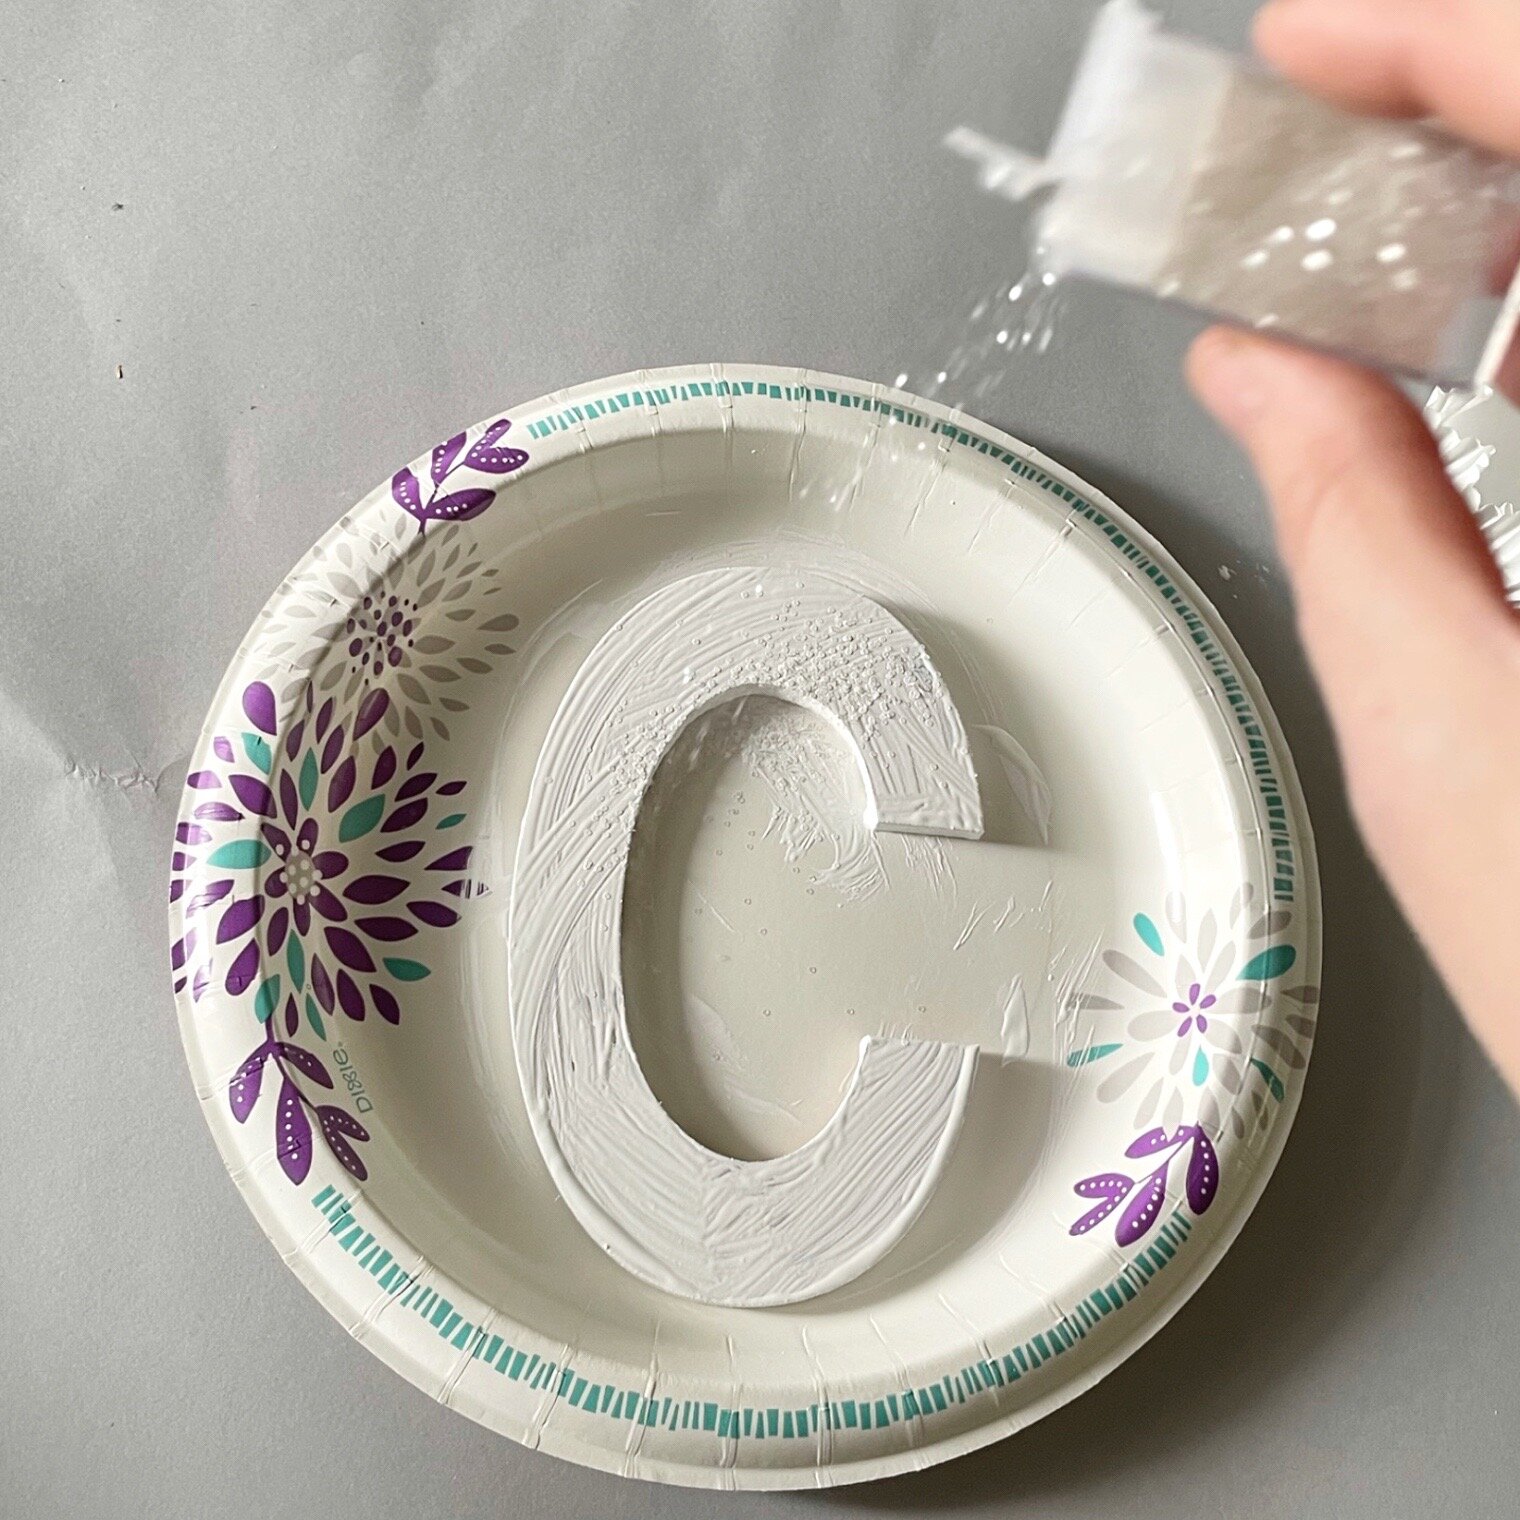
The first thing you want to start with is painting your letter so that it has time to dry.
Cover your letter completely and while the paint is still wet, add glitter and gently press it down into the paint.
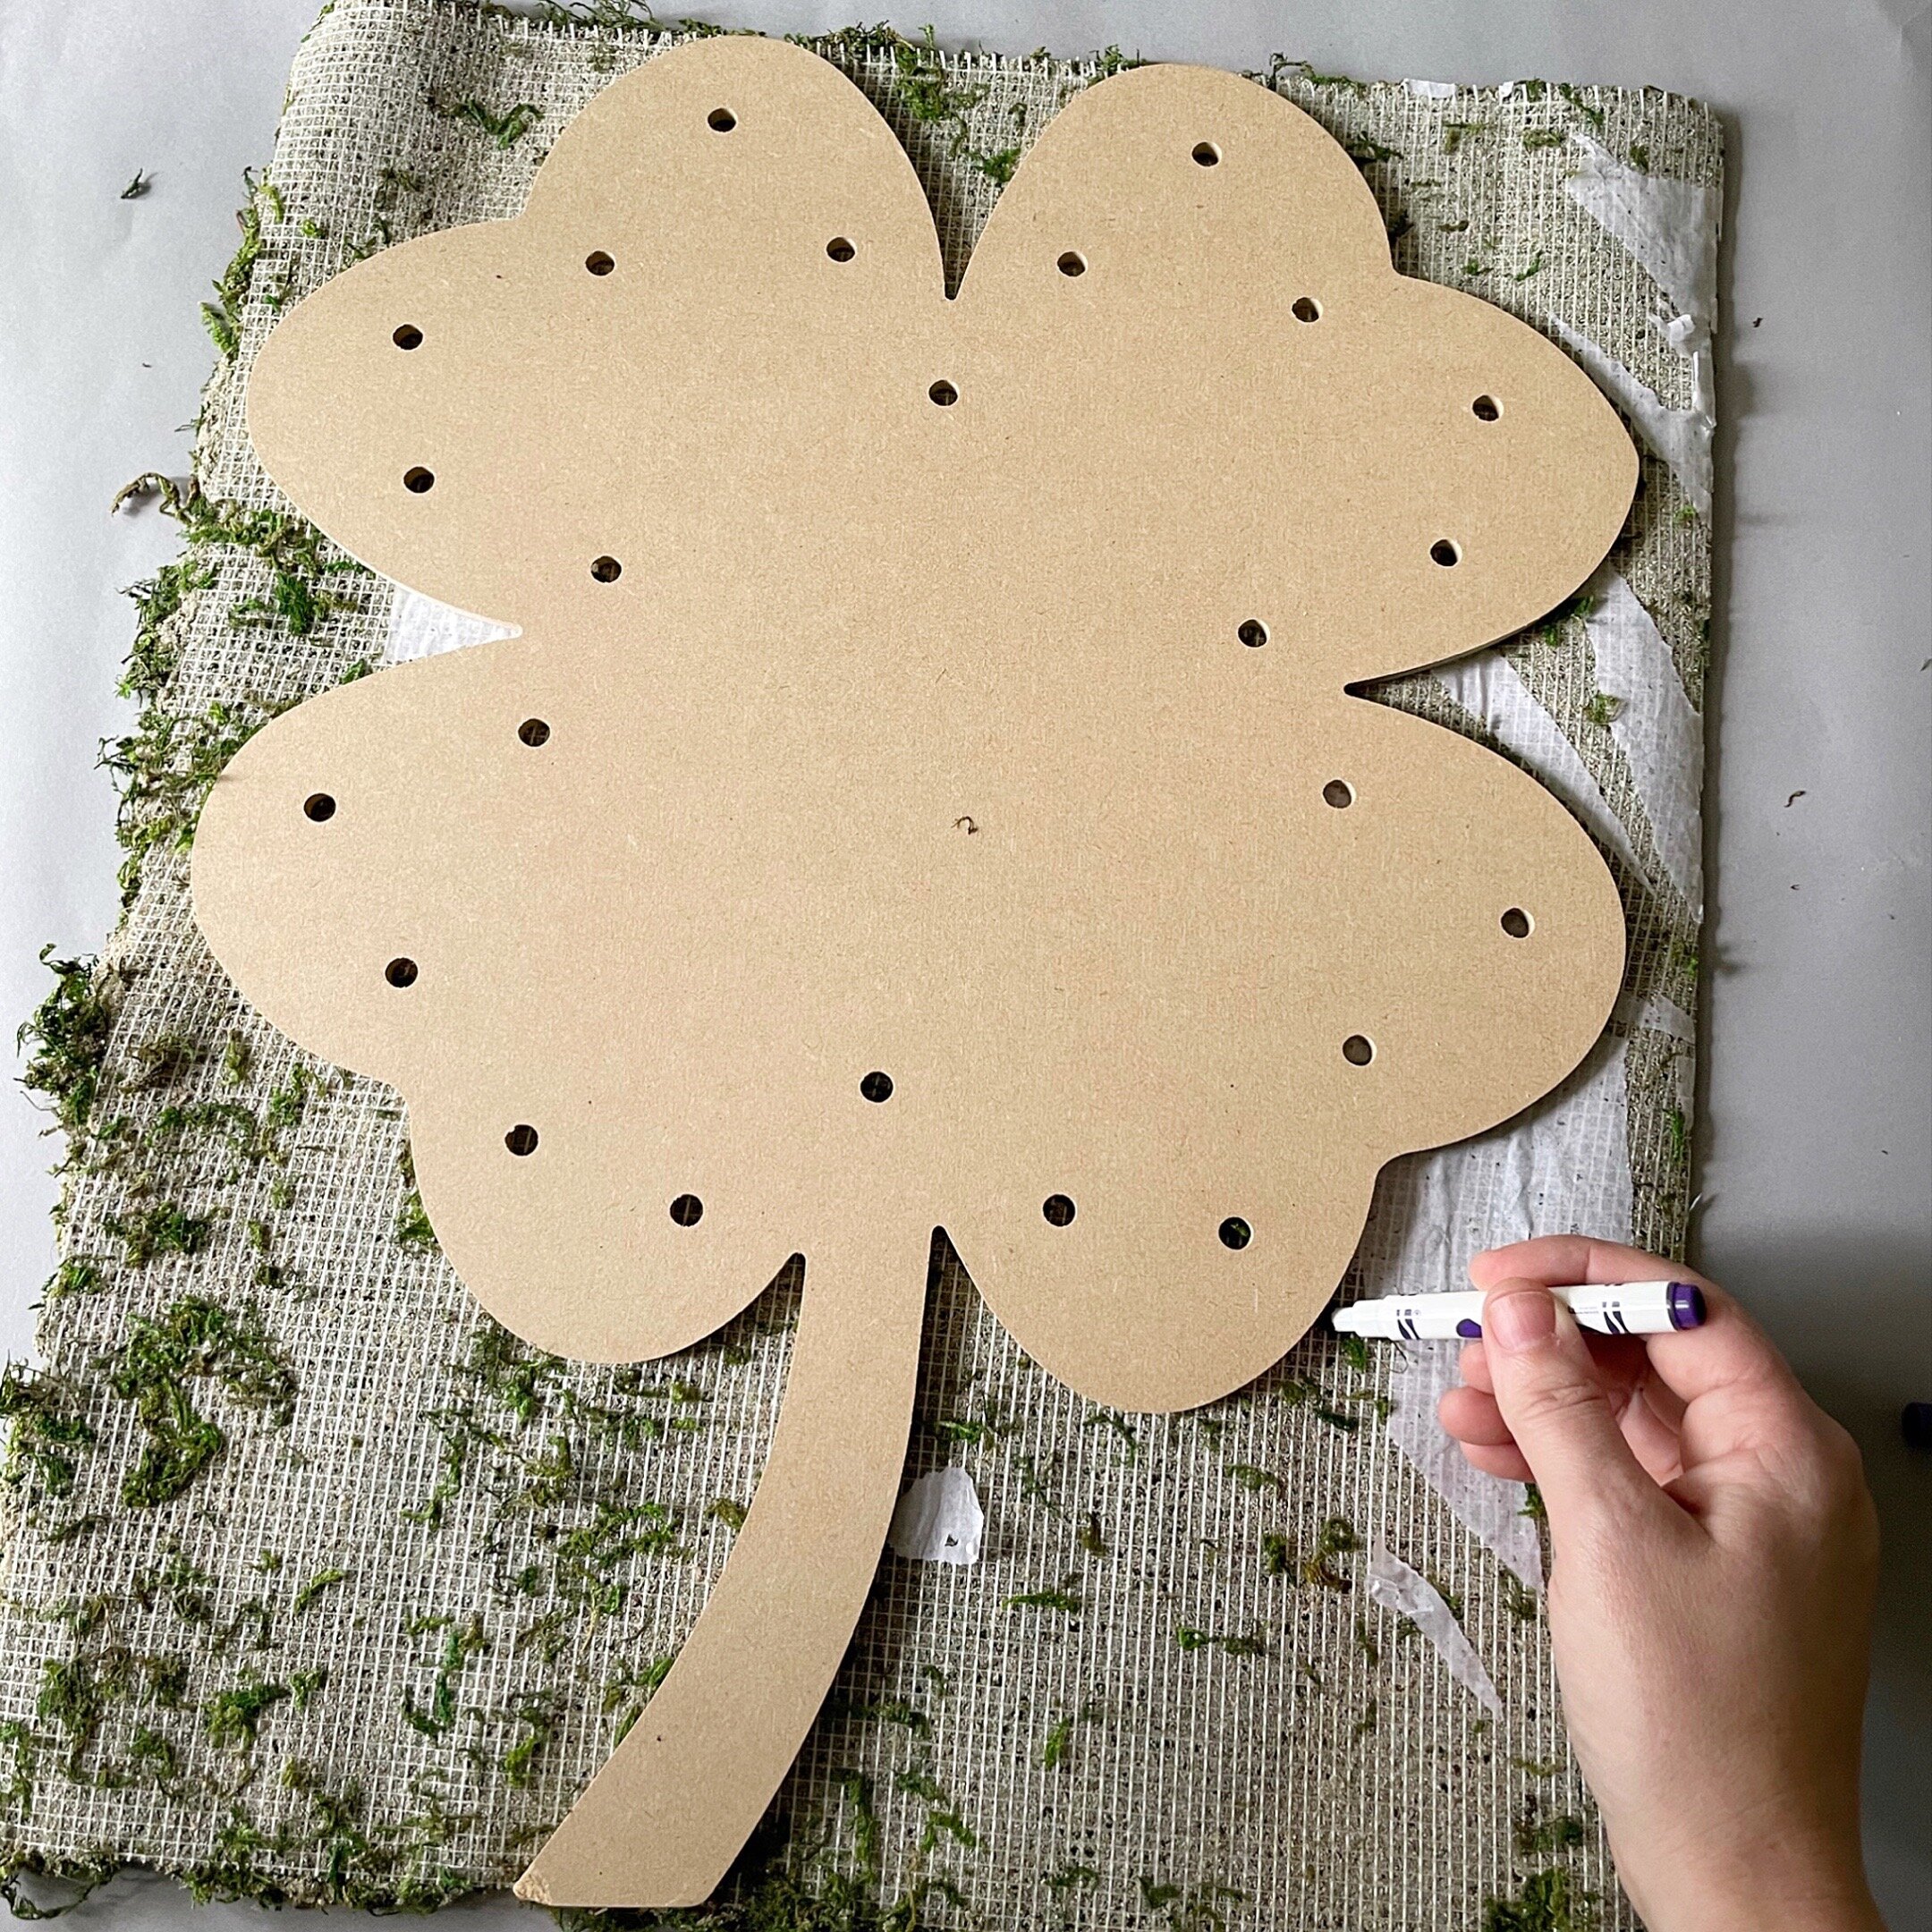
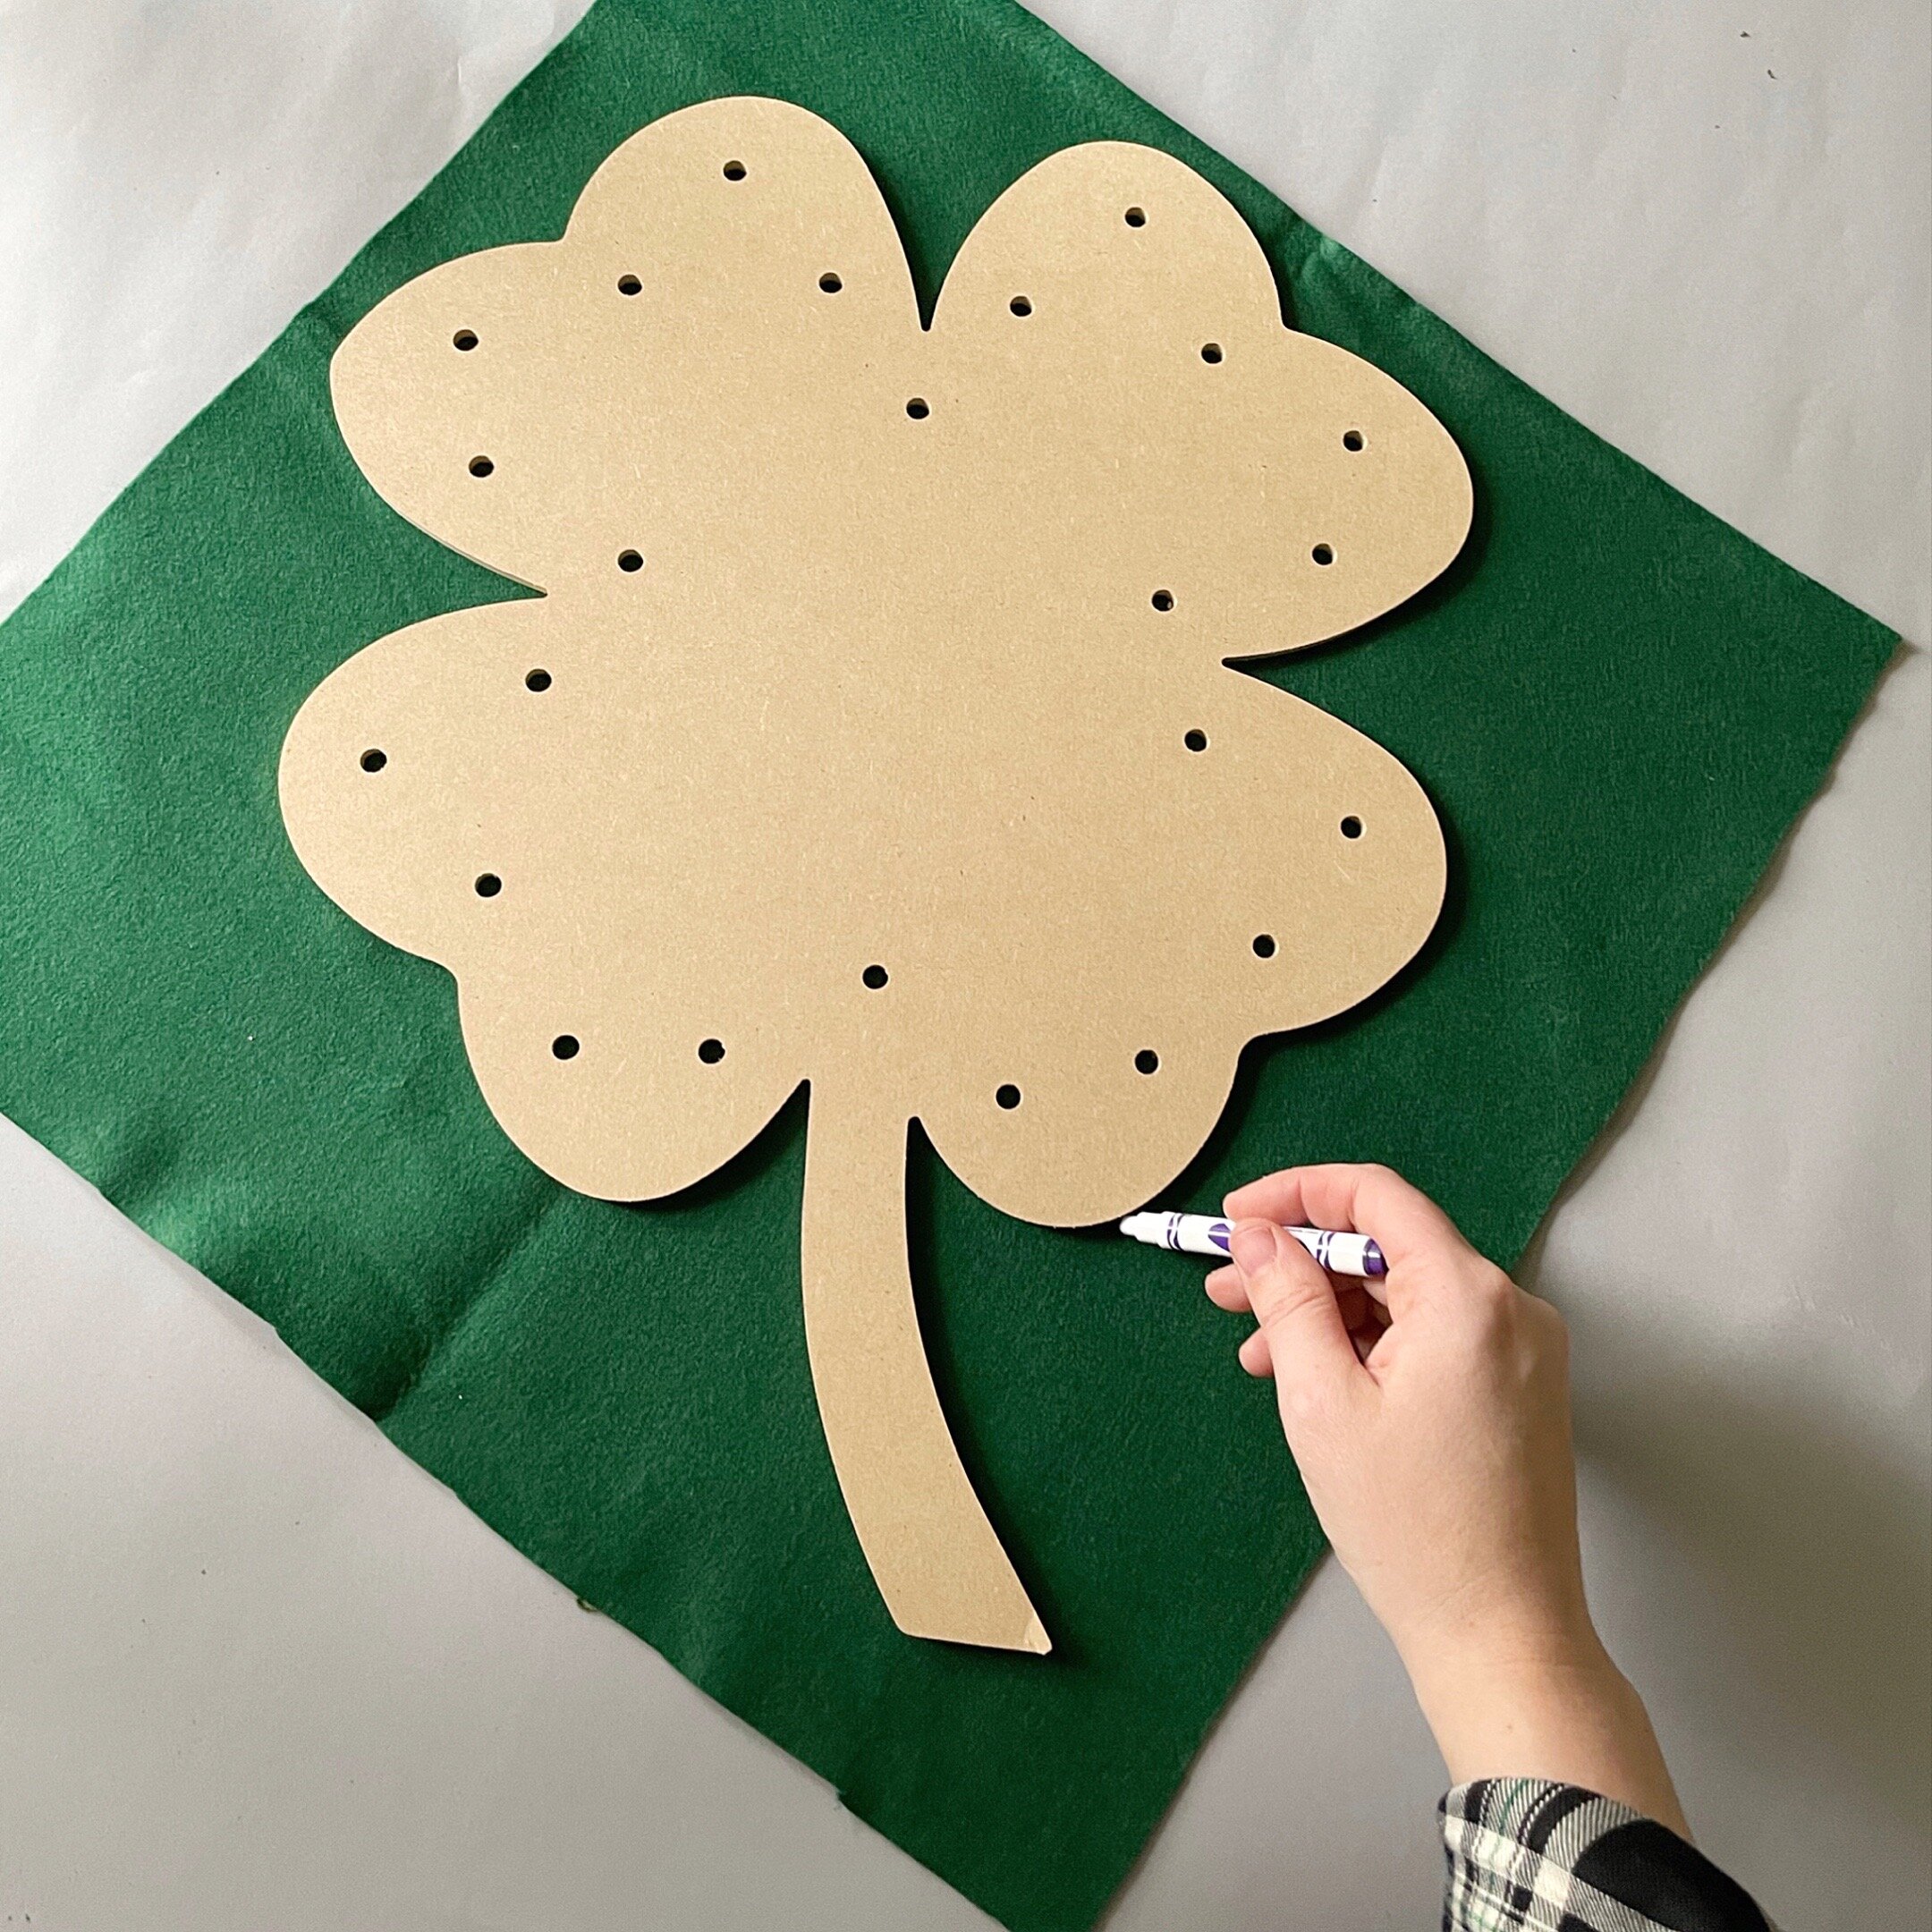
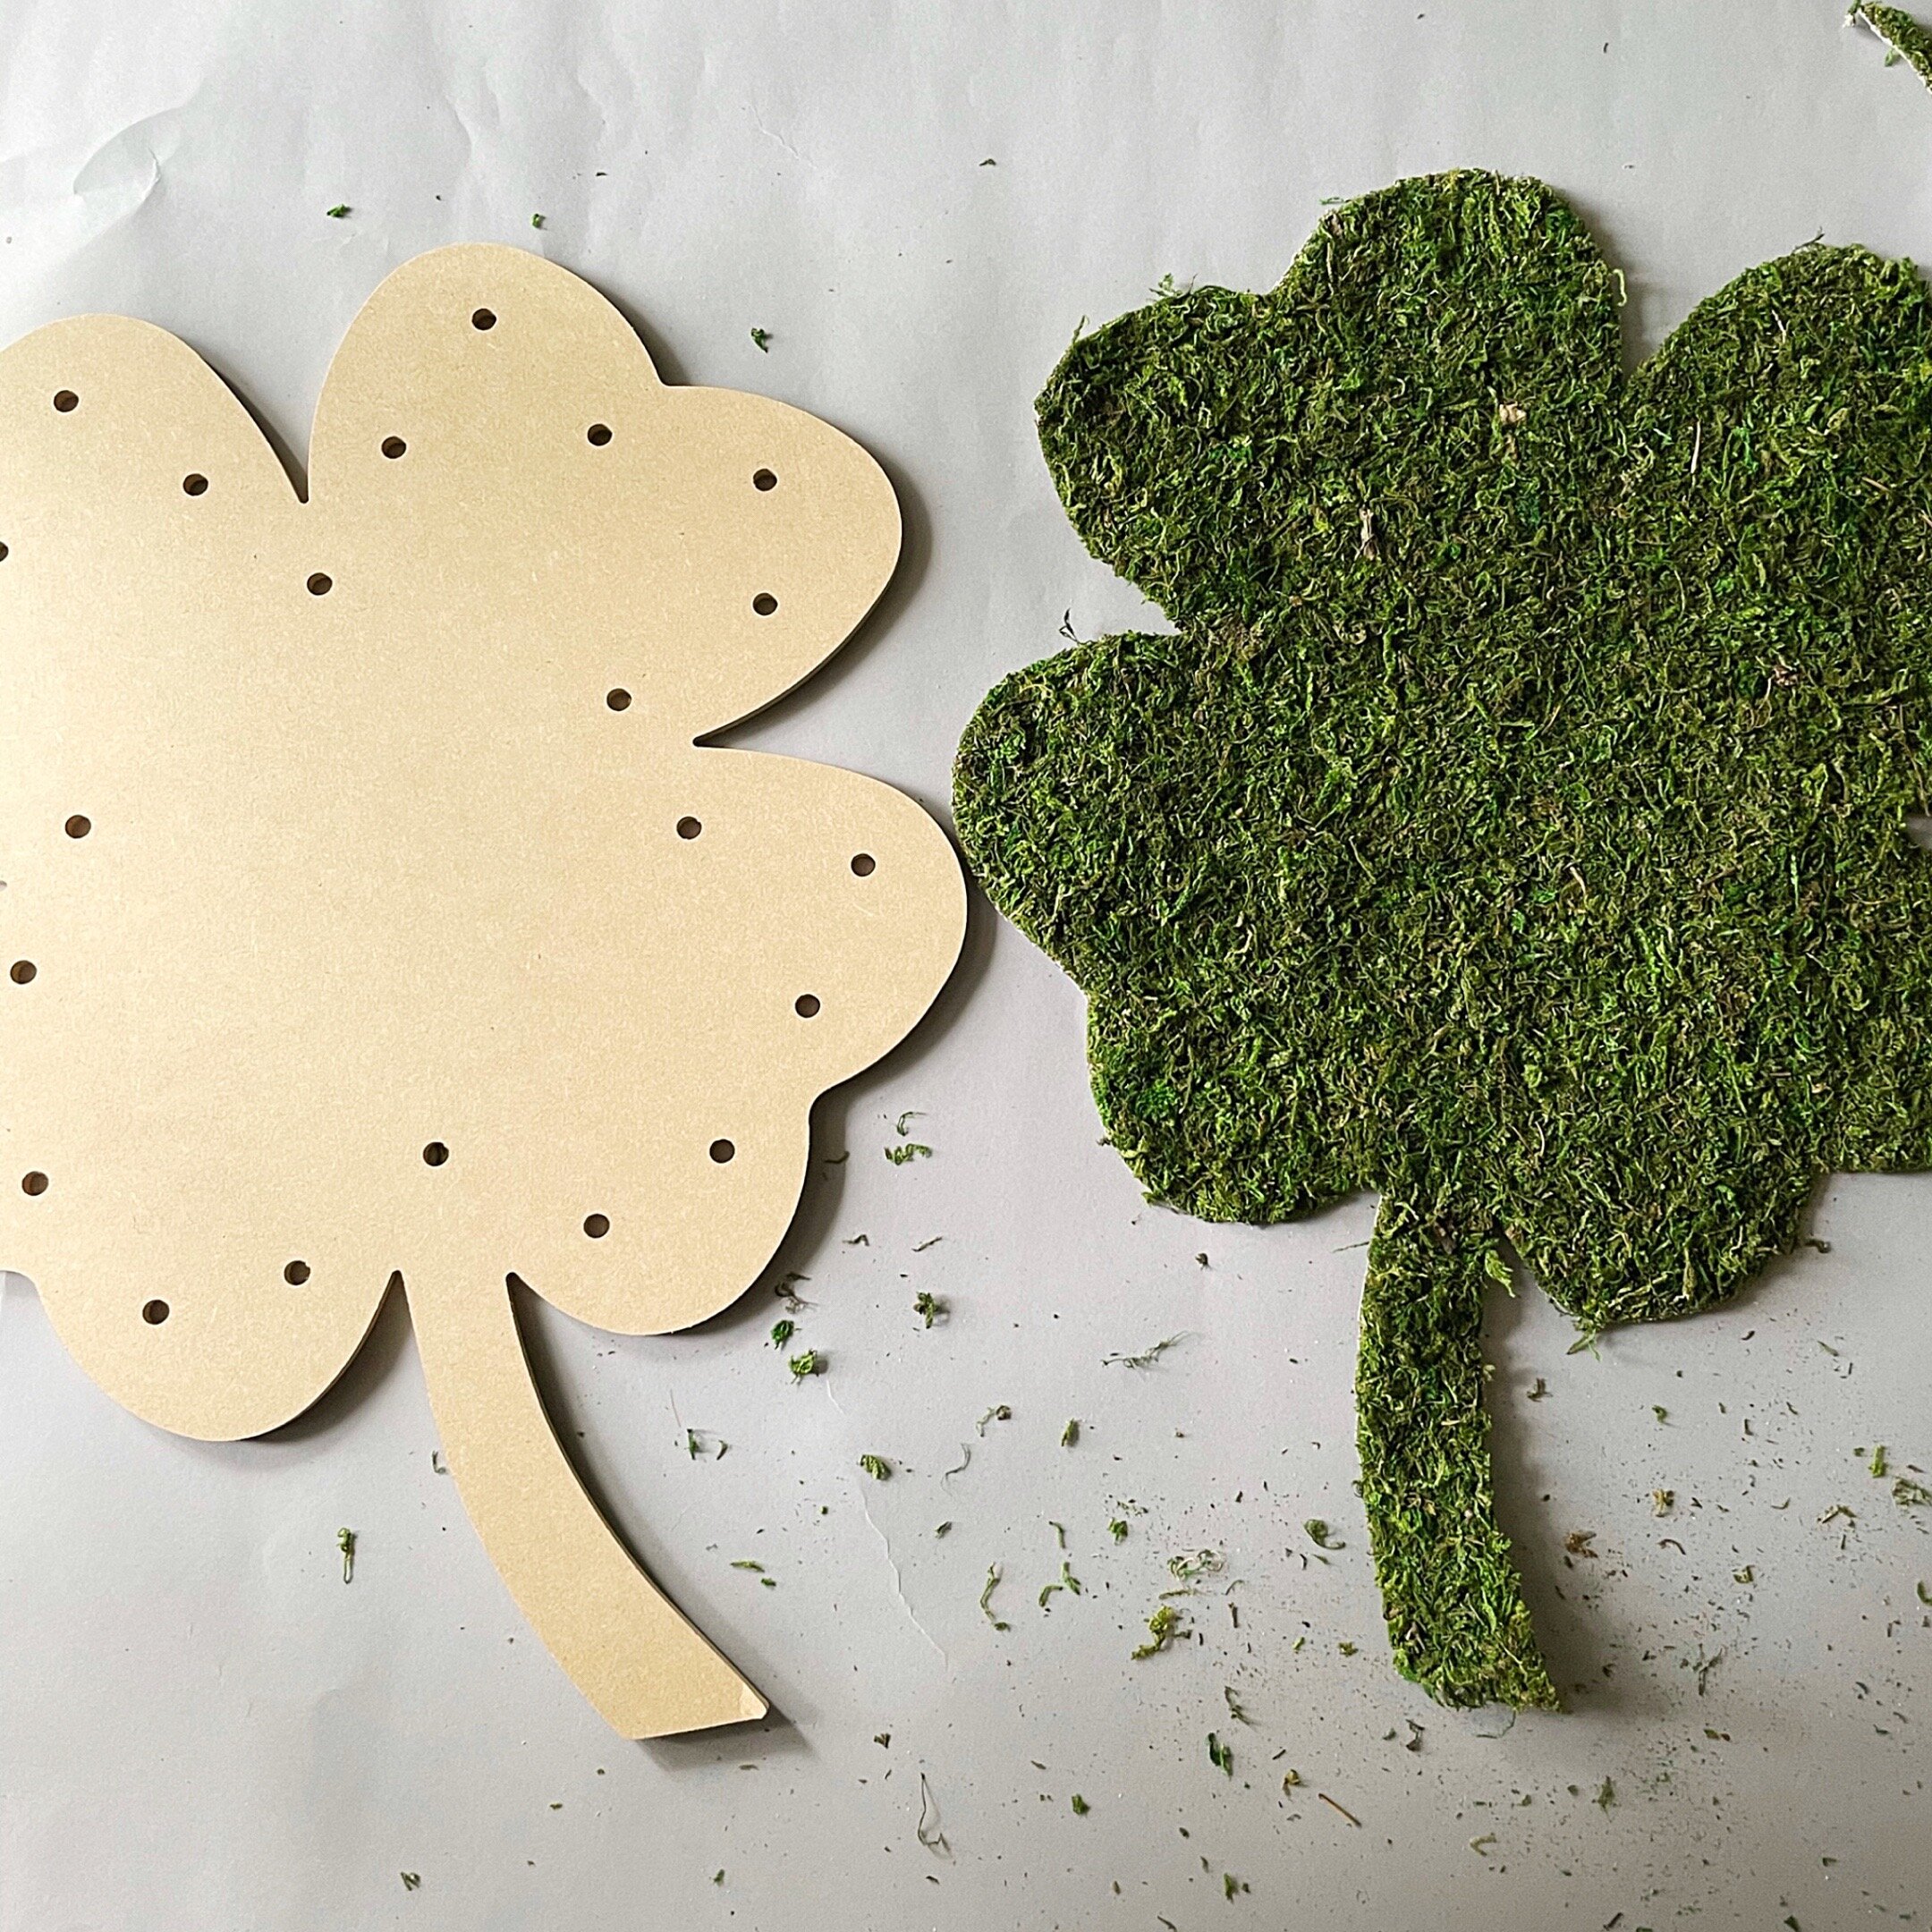
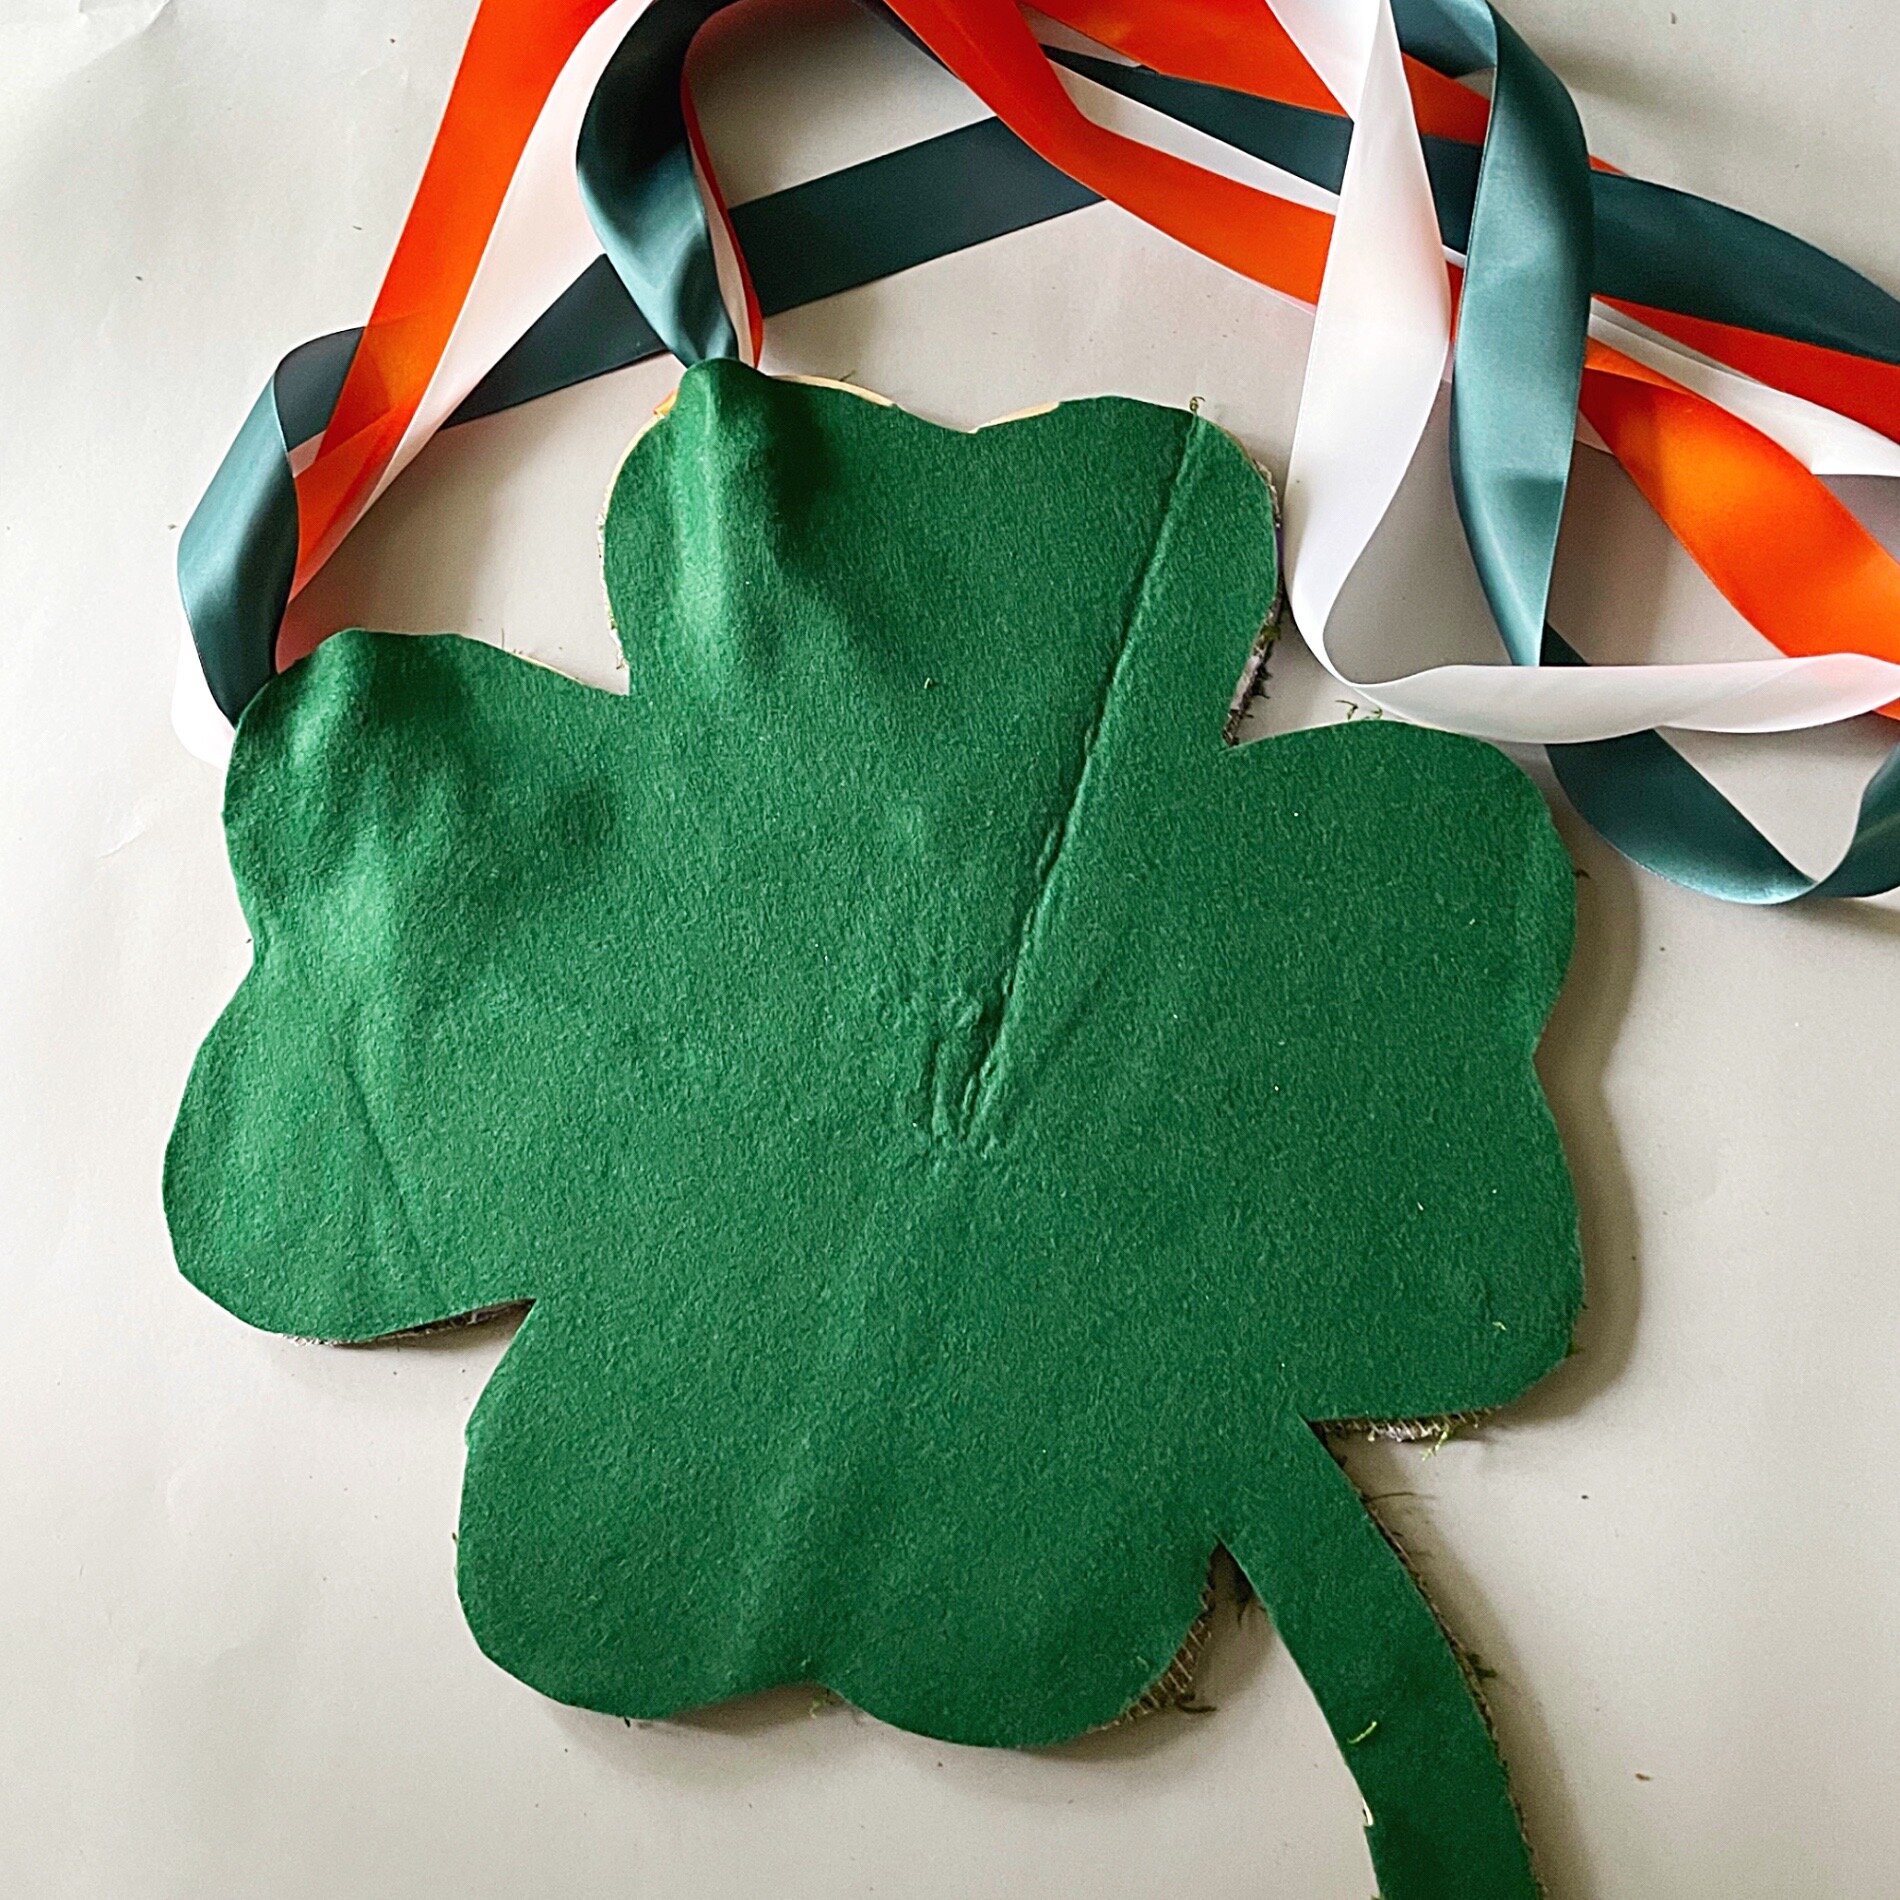
The next thing you will want to do is trace the outside shape of the shamrock onto the back of the moss, and then onto the back of the felt. Then cut them out using scissors.
CAUTION: When you trace the moss, realize that the side that is face down will be the front, and you will want to make the knots in the next steps on the back.
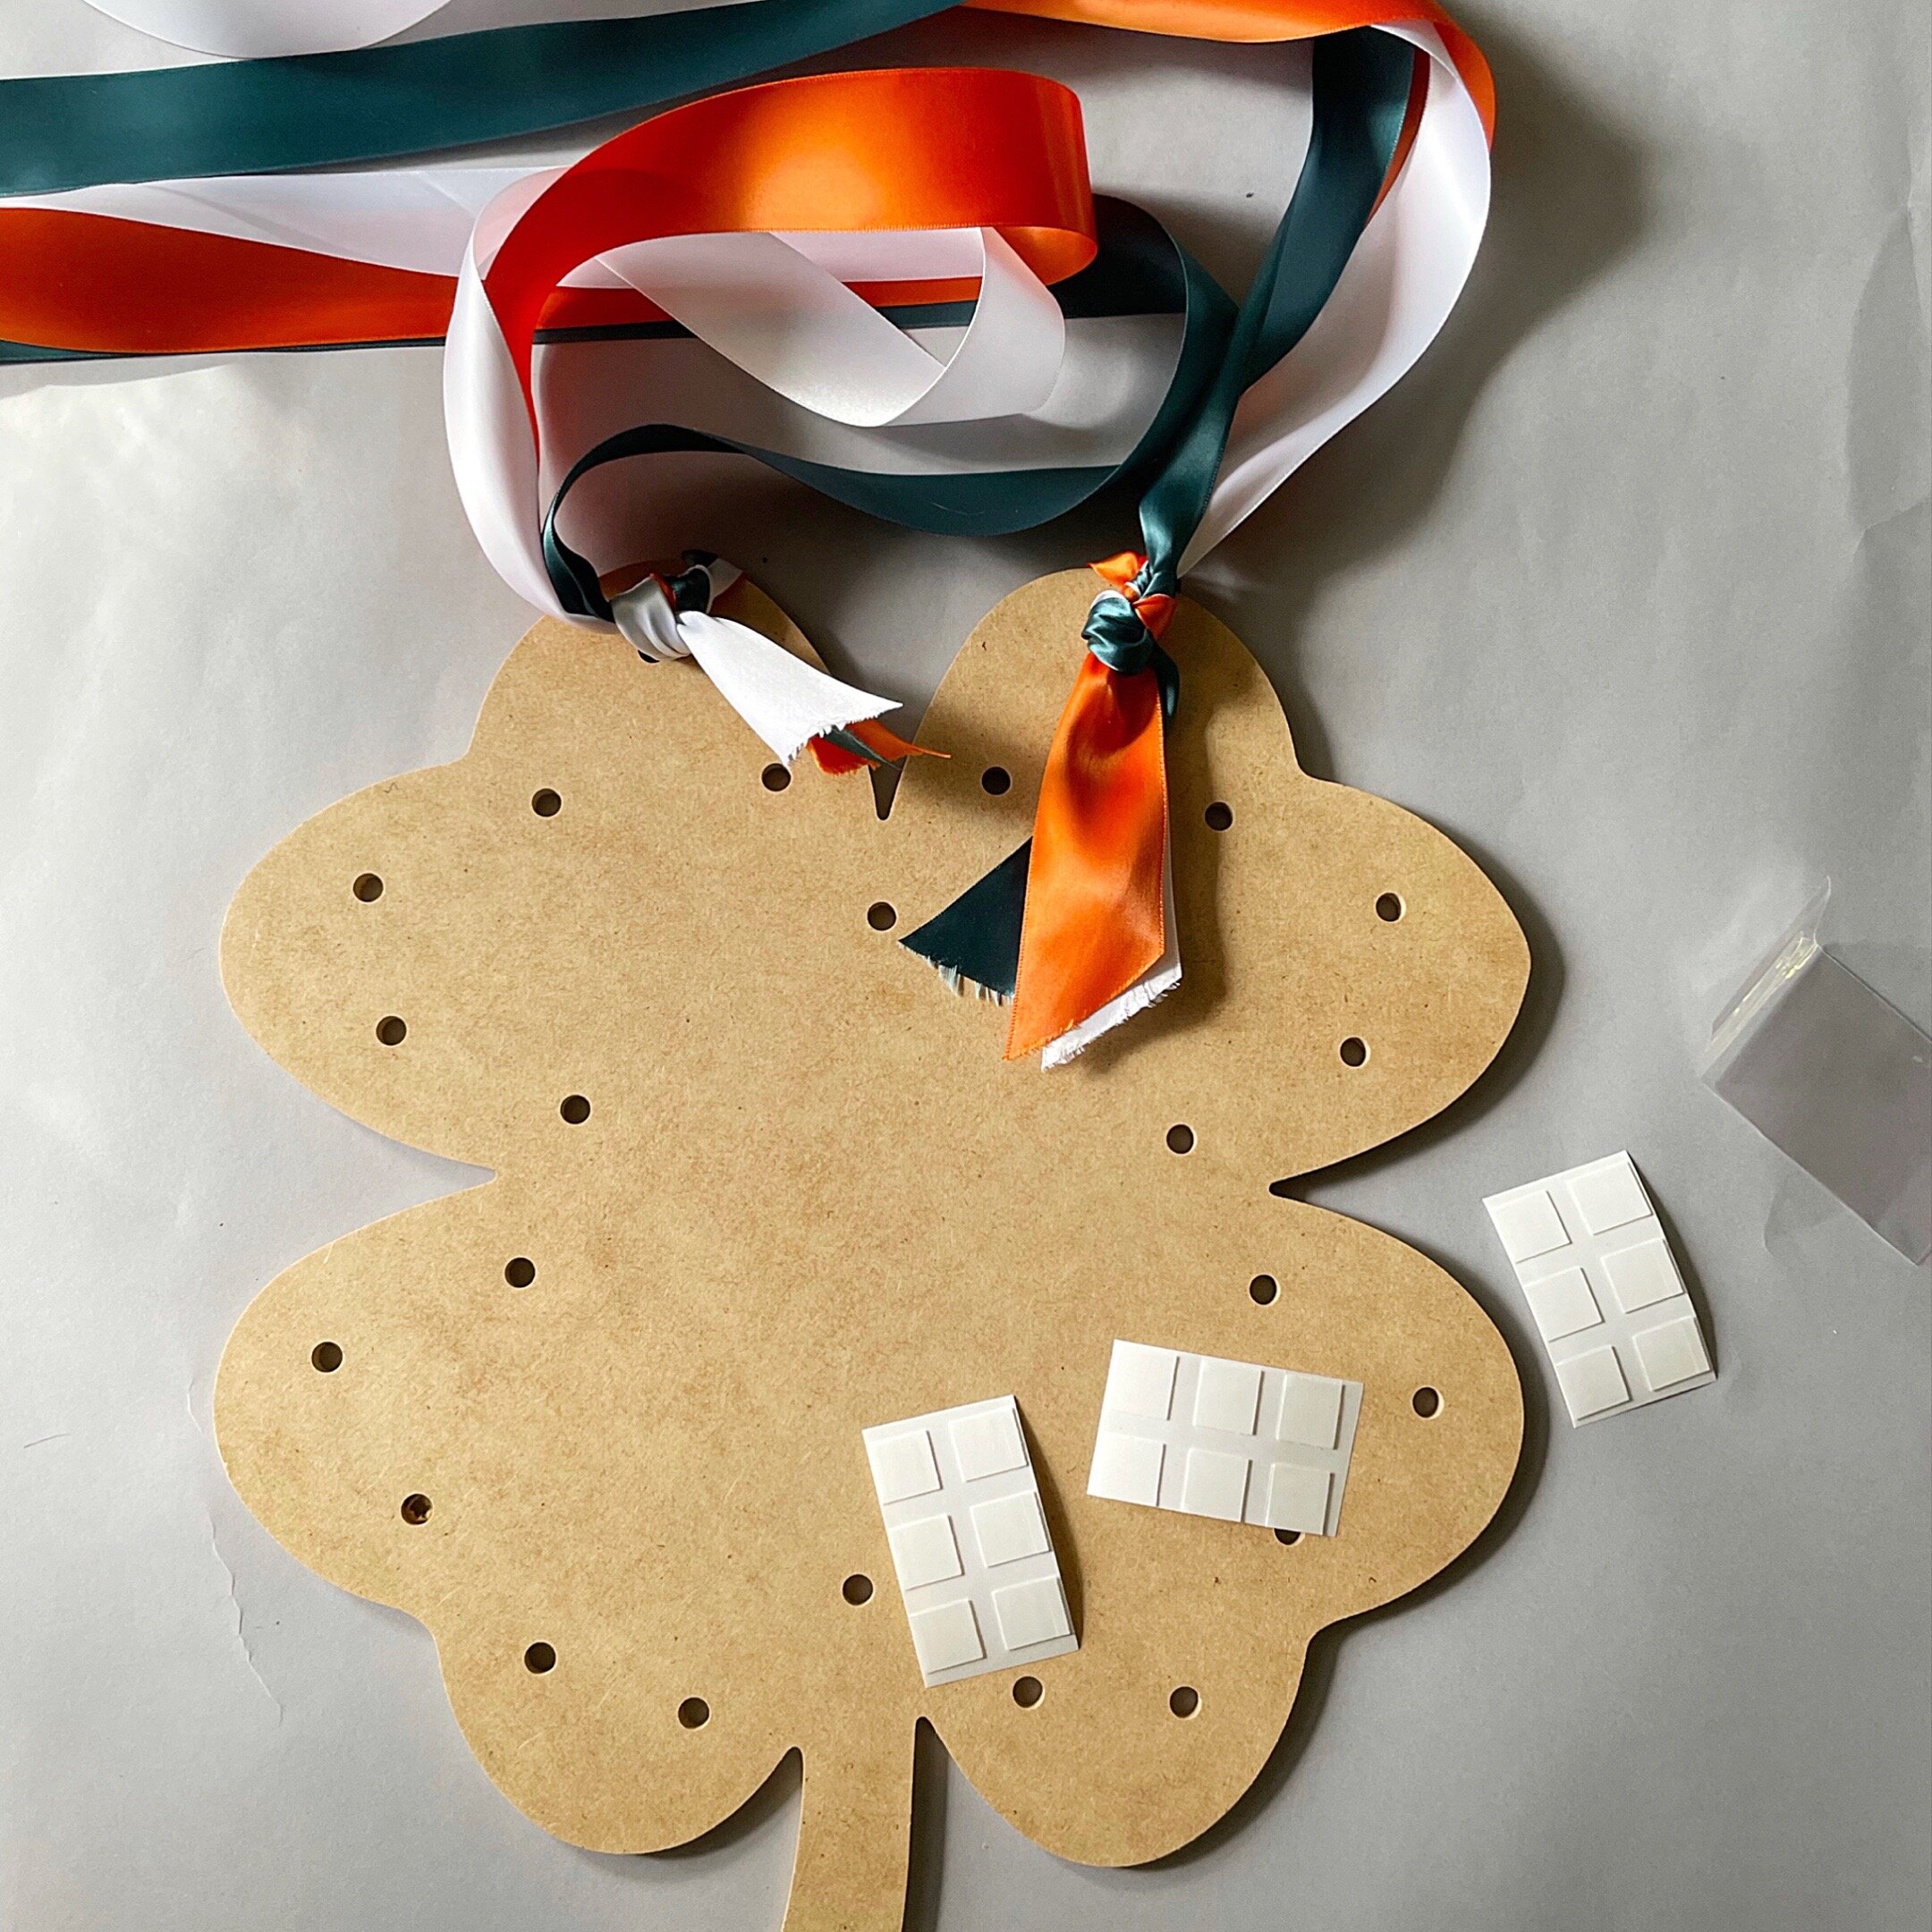
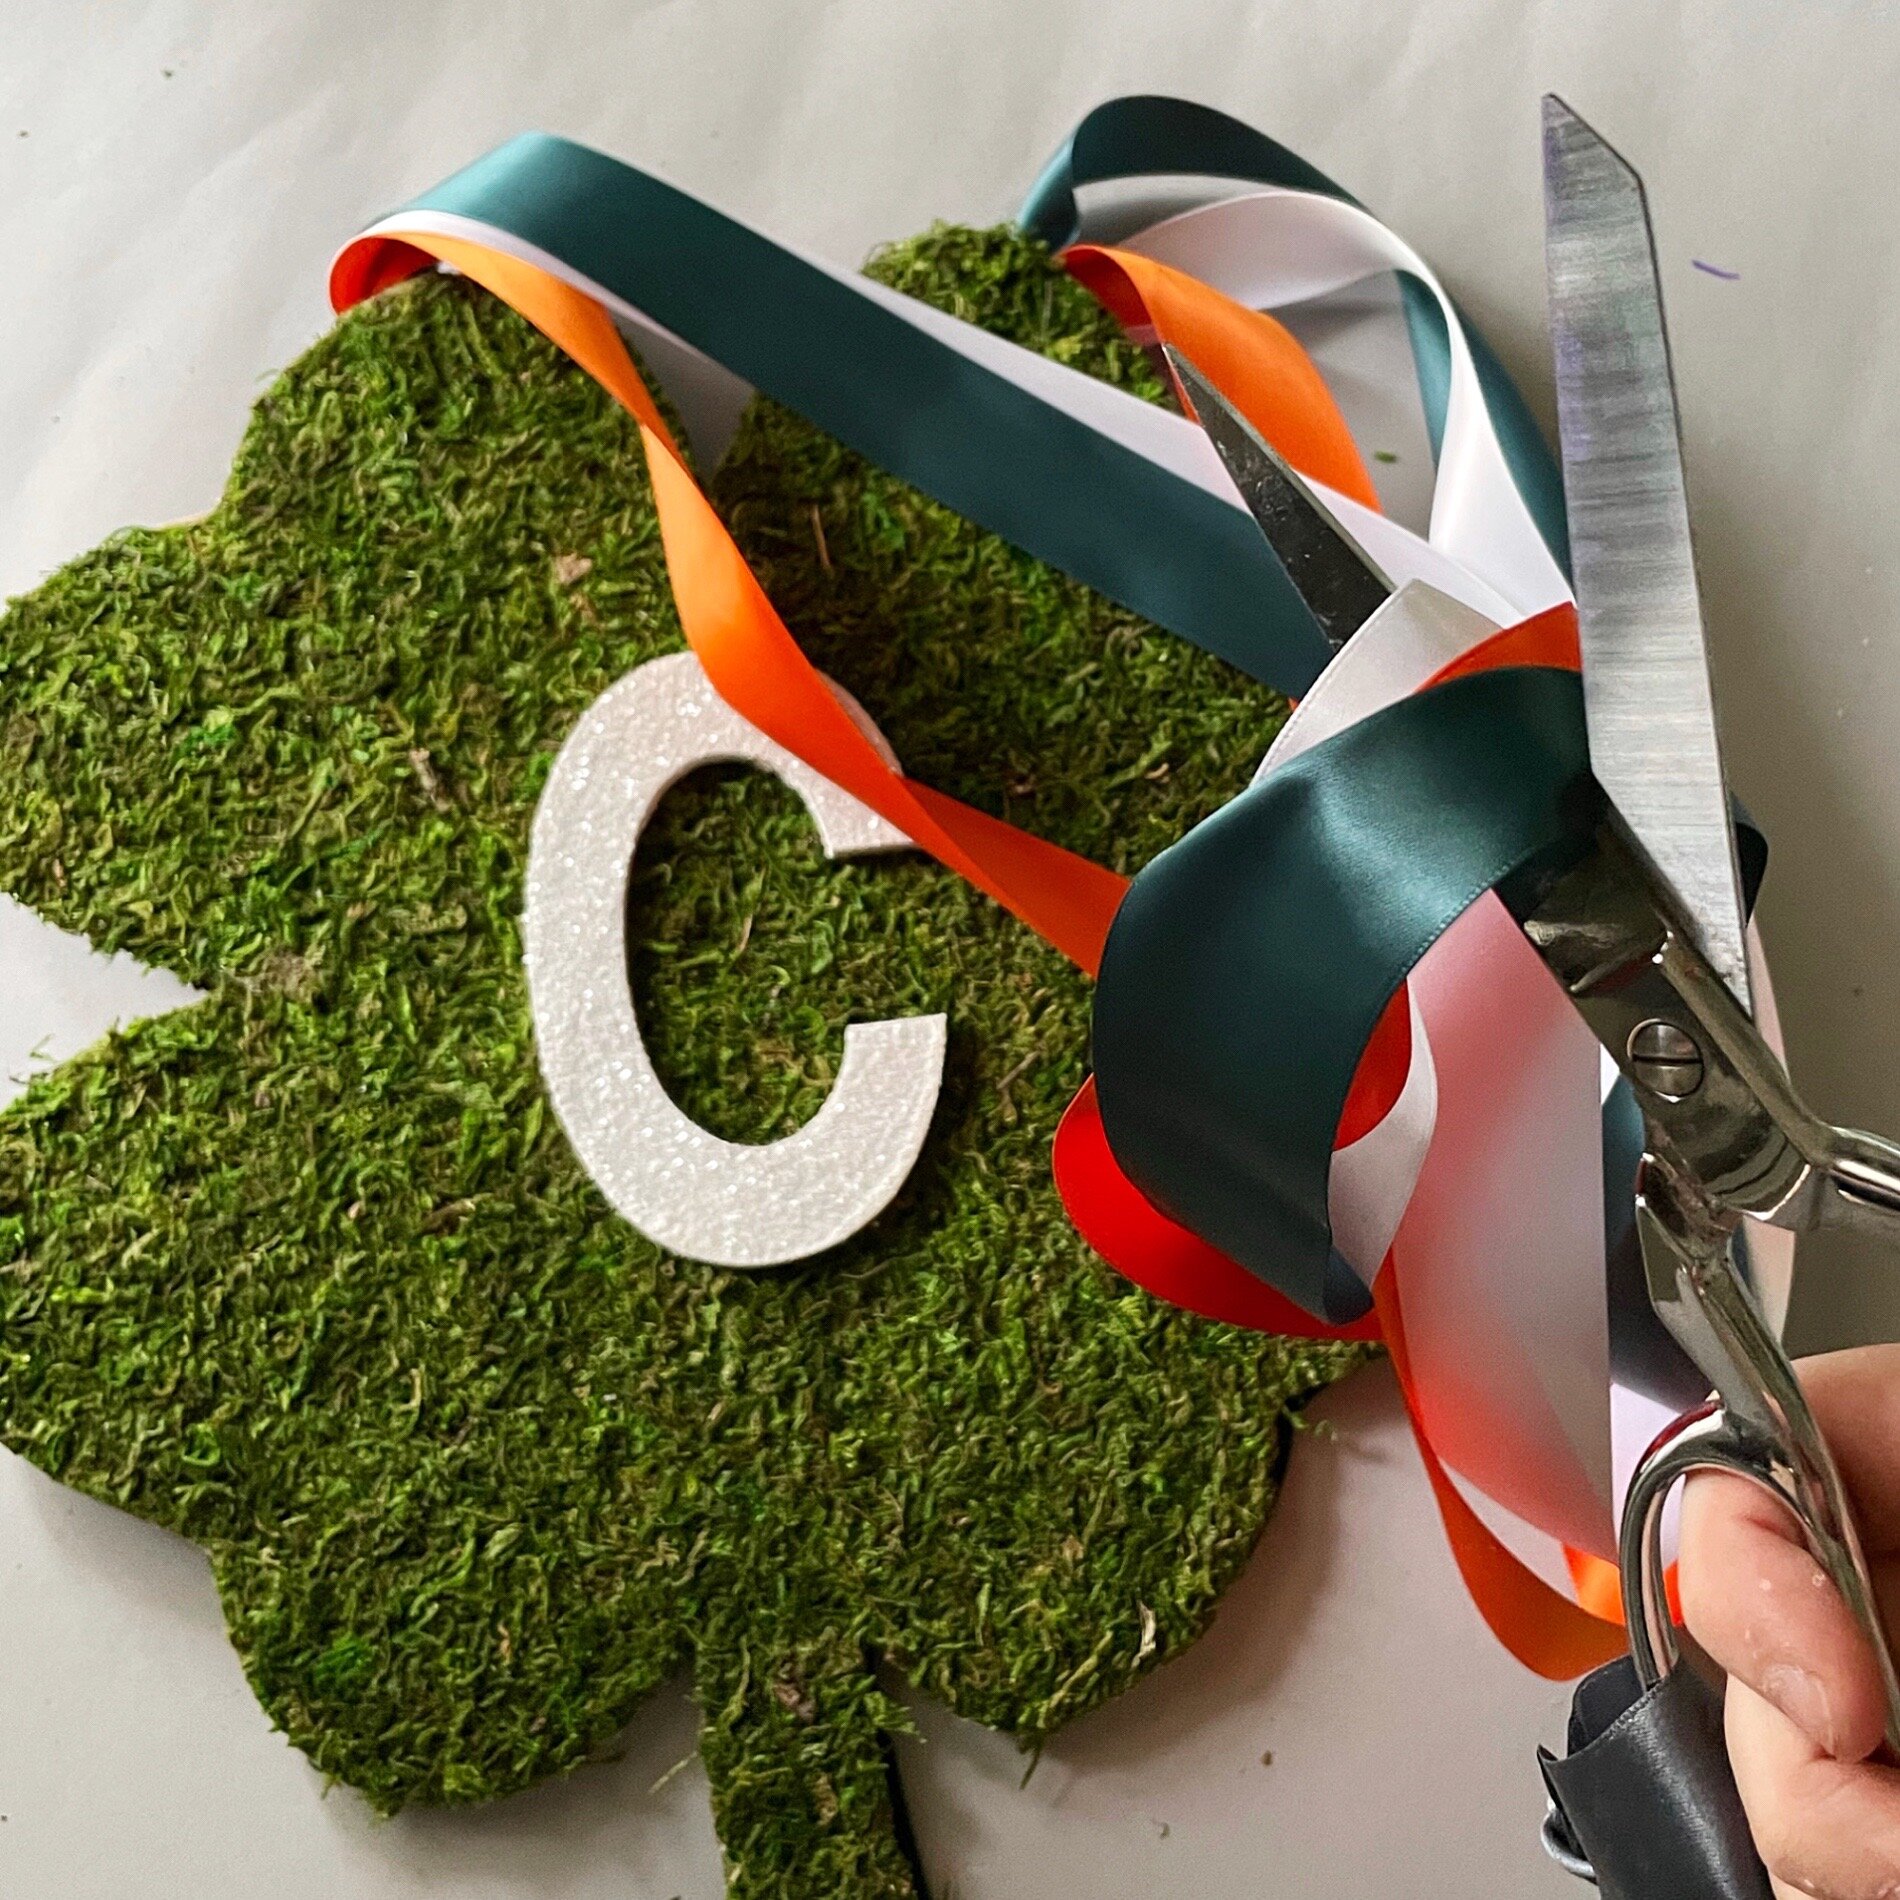
Thread your ribbon through the top holes on either side. You can use just one ribbon, or multiple ribbons, this is up to you.
Do not cut the ribbon in the middle, just yet.
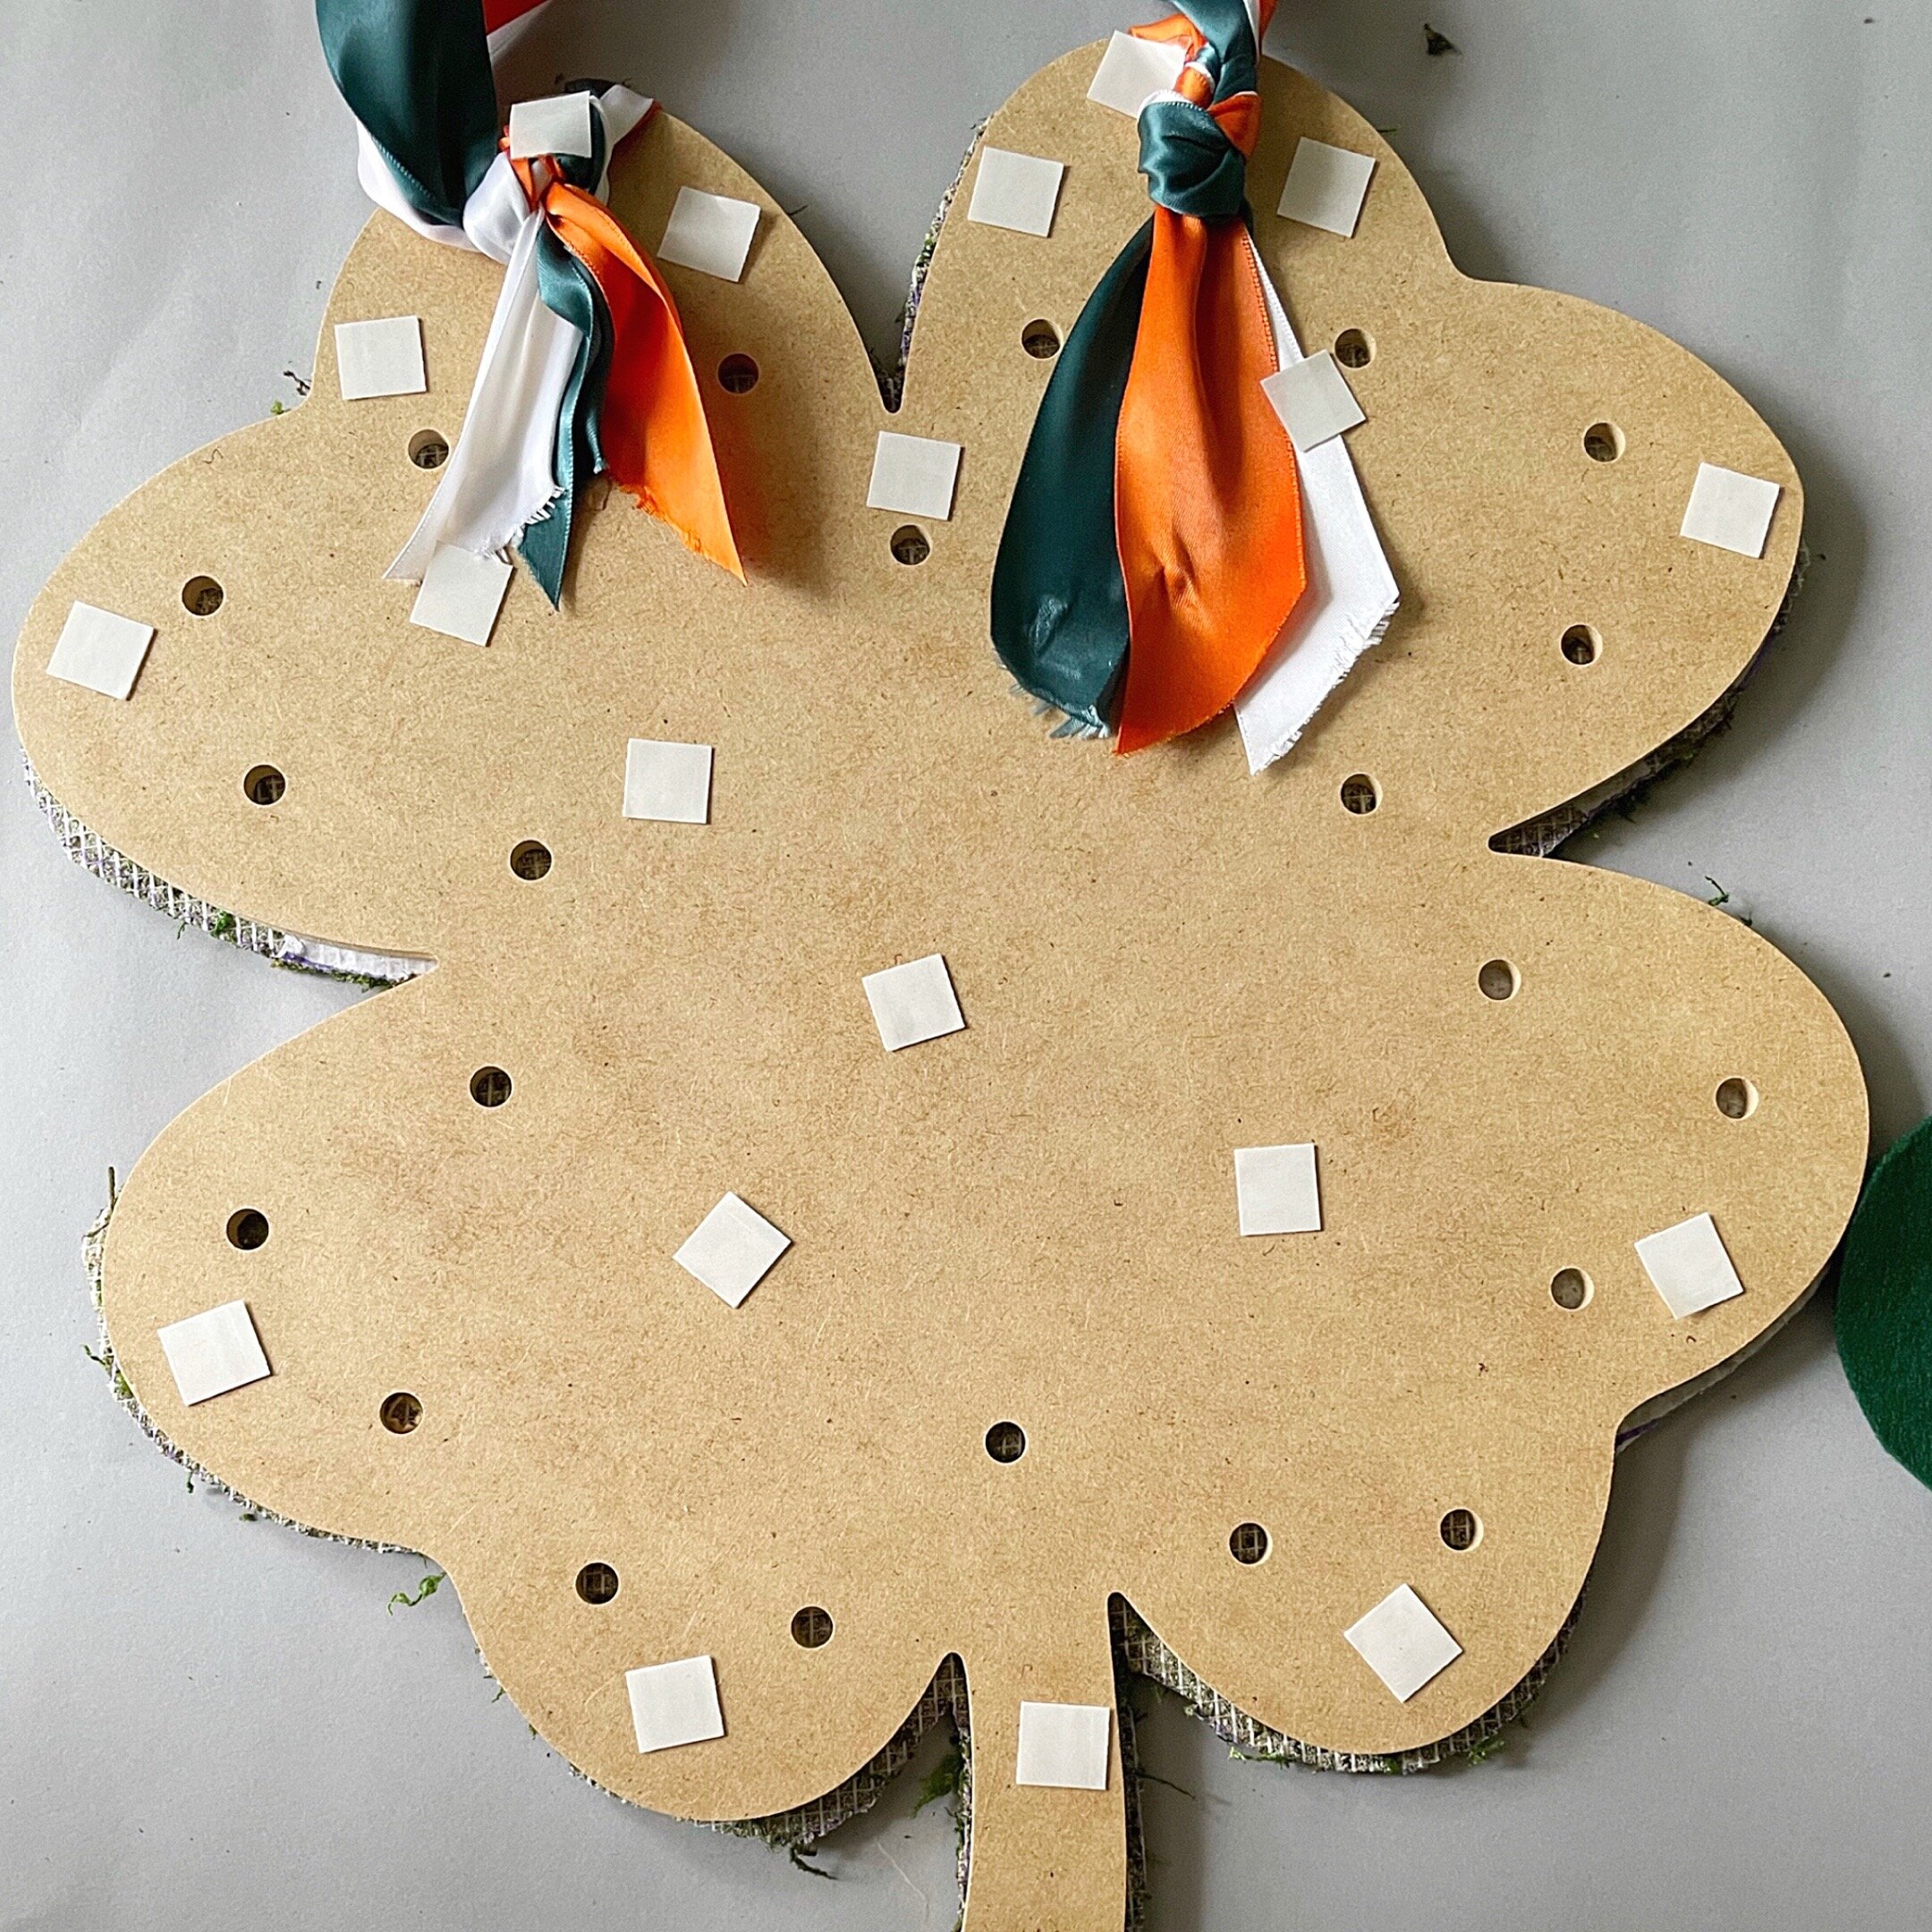
Secure with double knots, and then take a few glue dots to press the ends down and secure the ribbon in place.
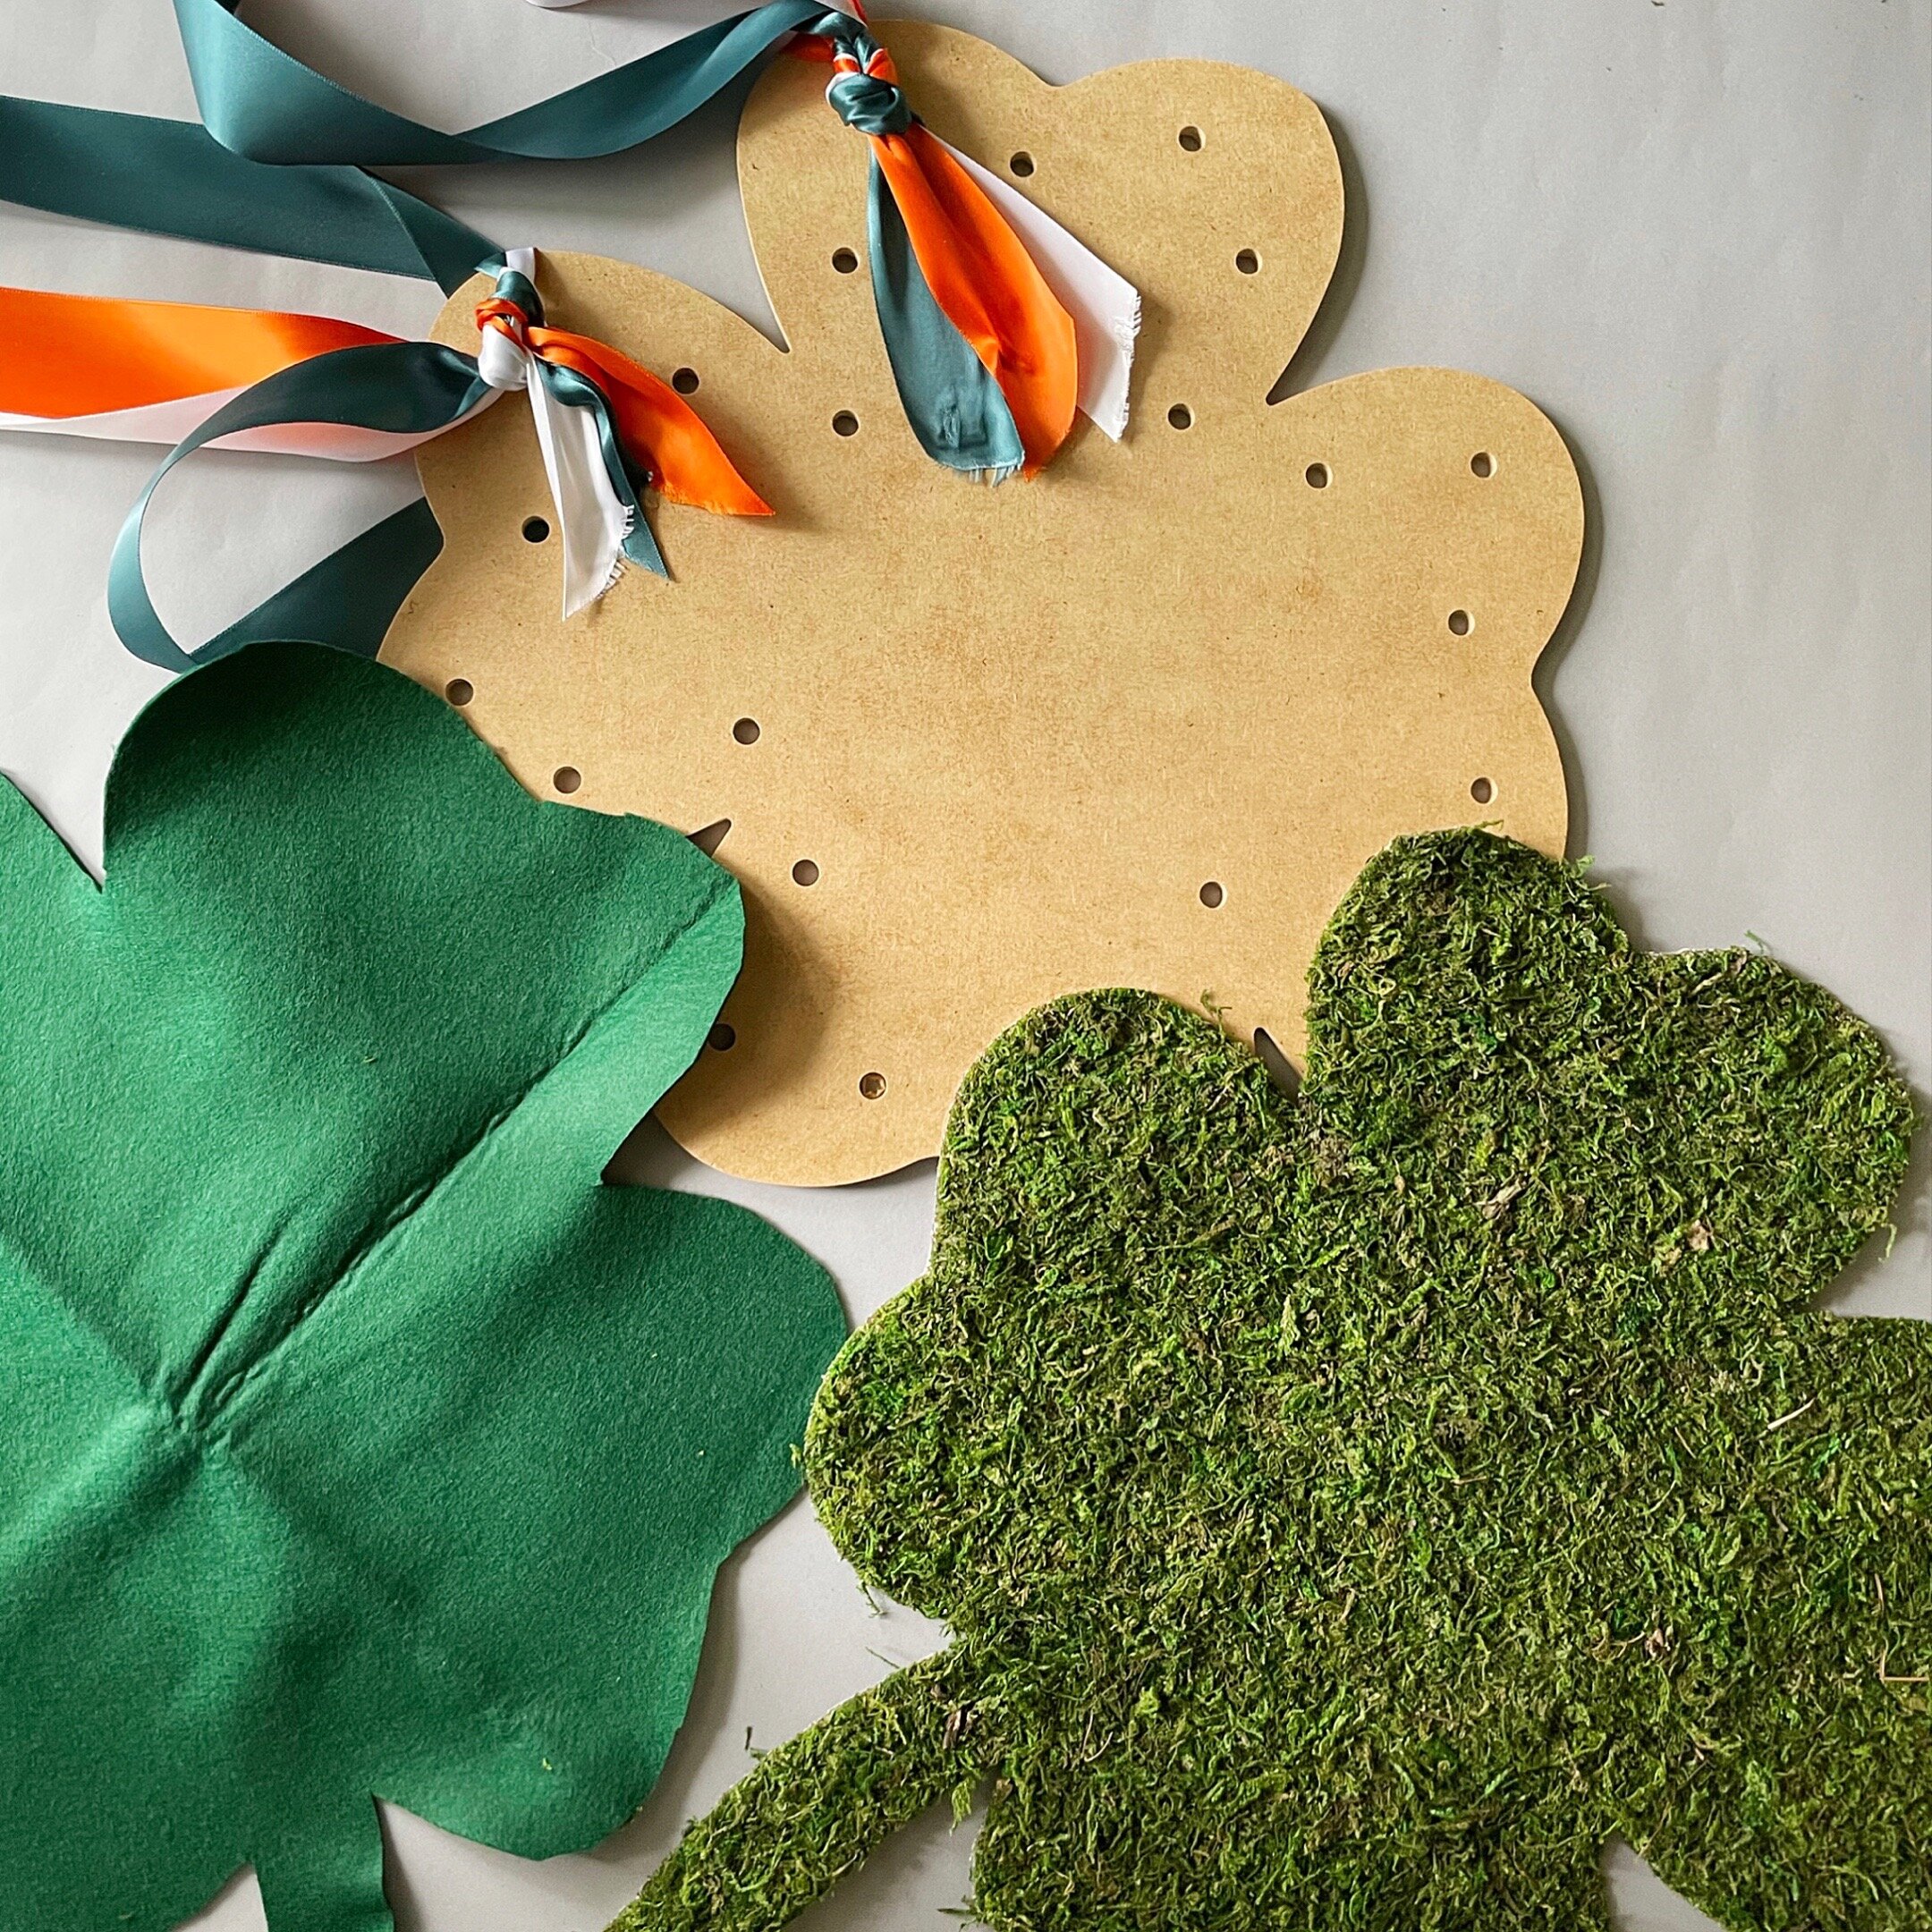
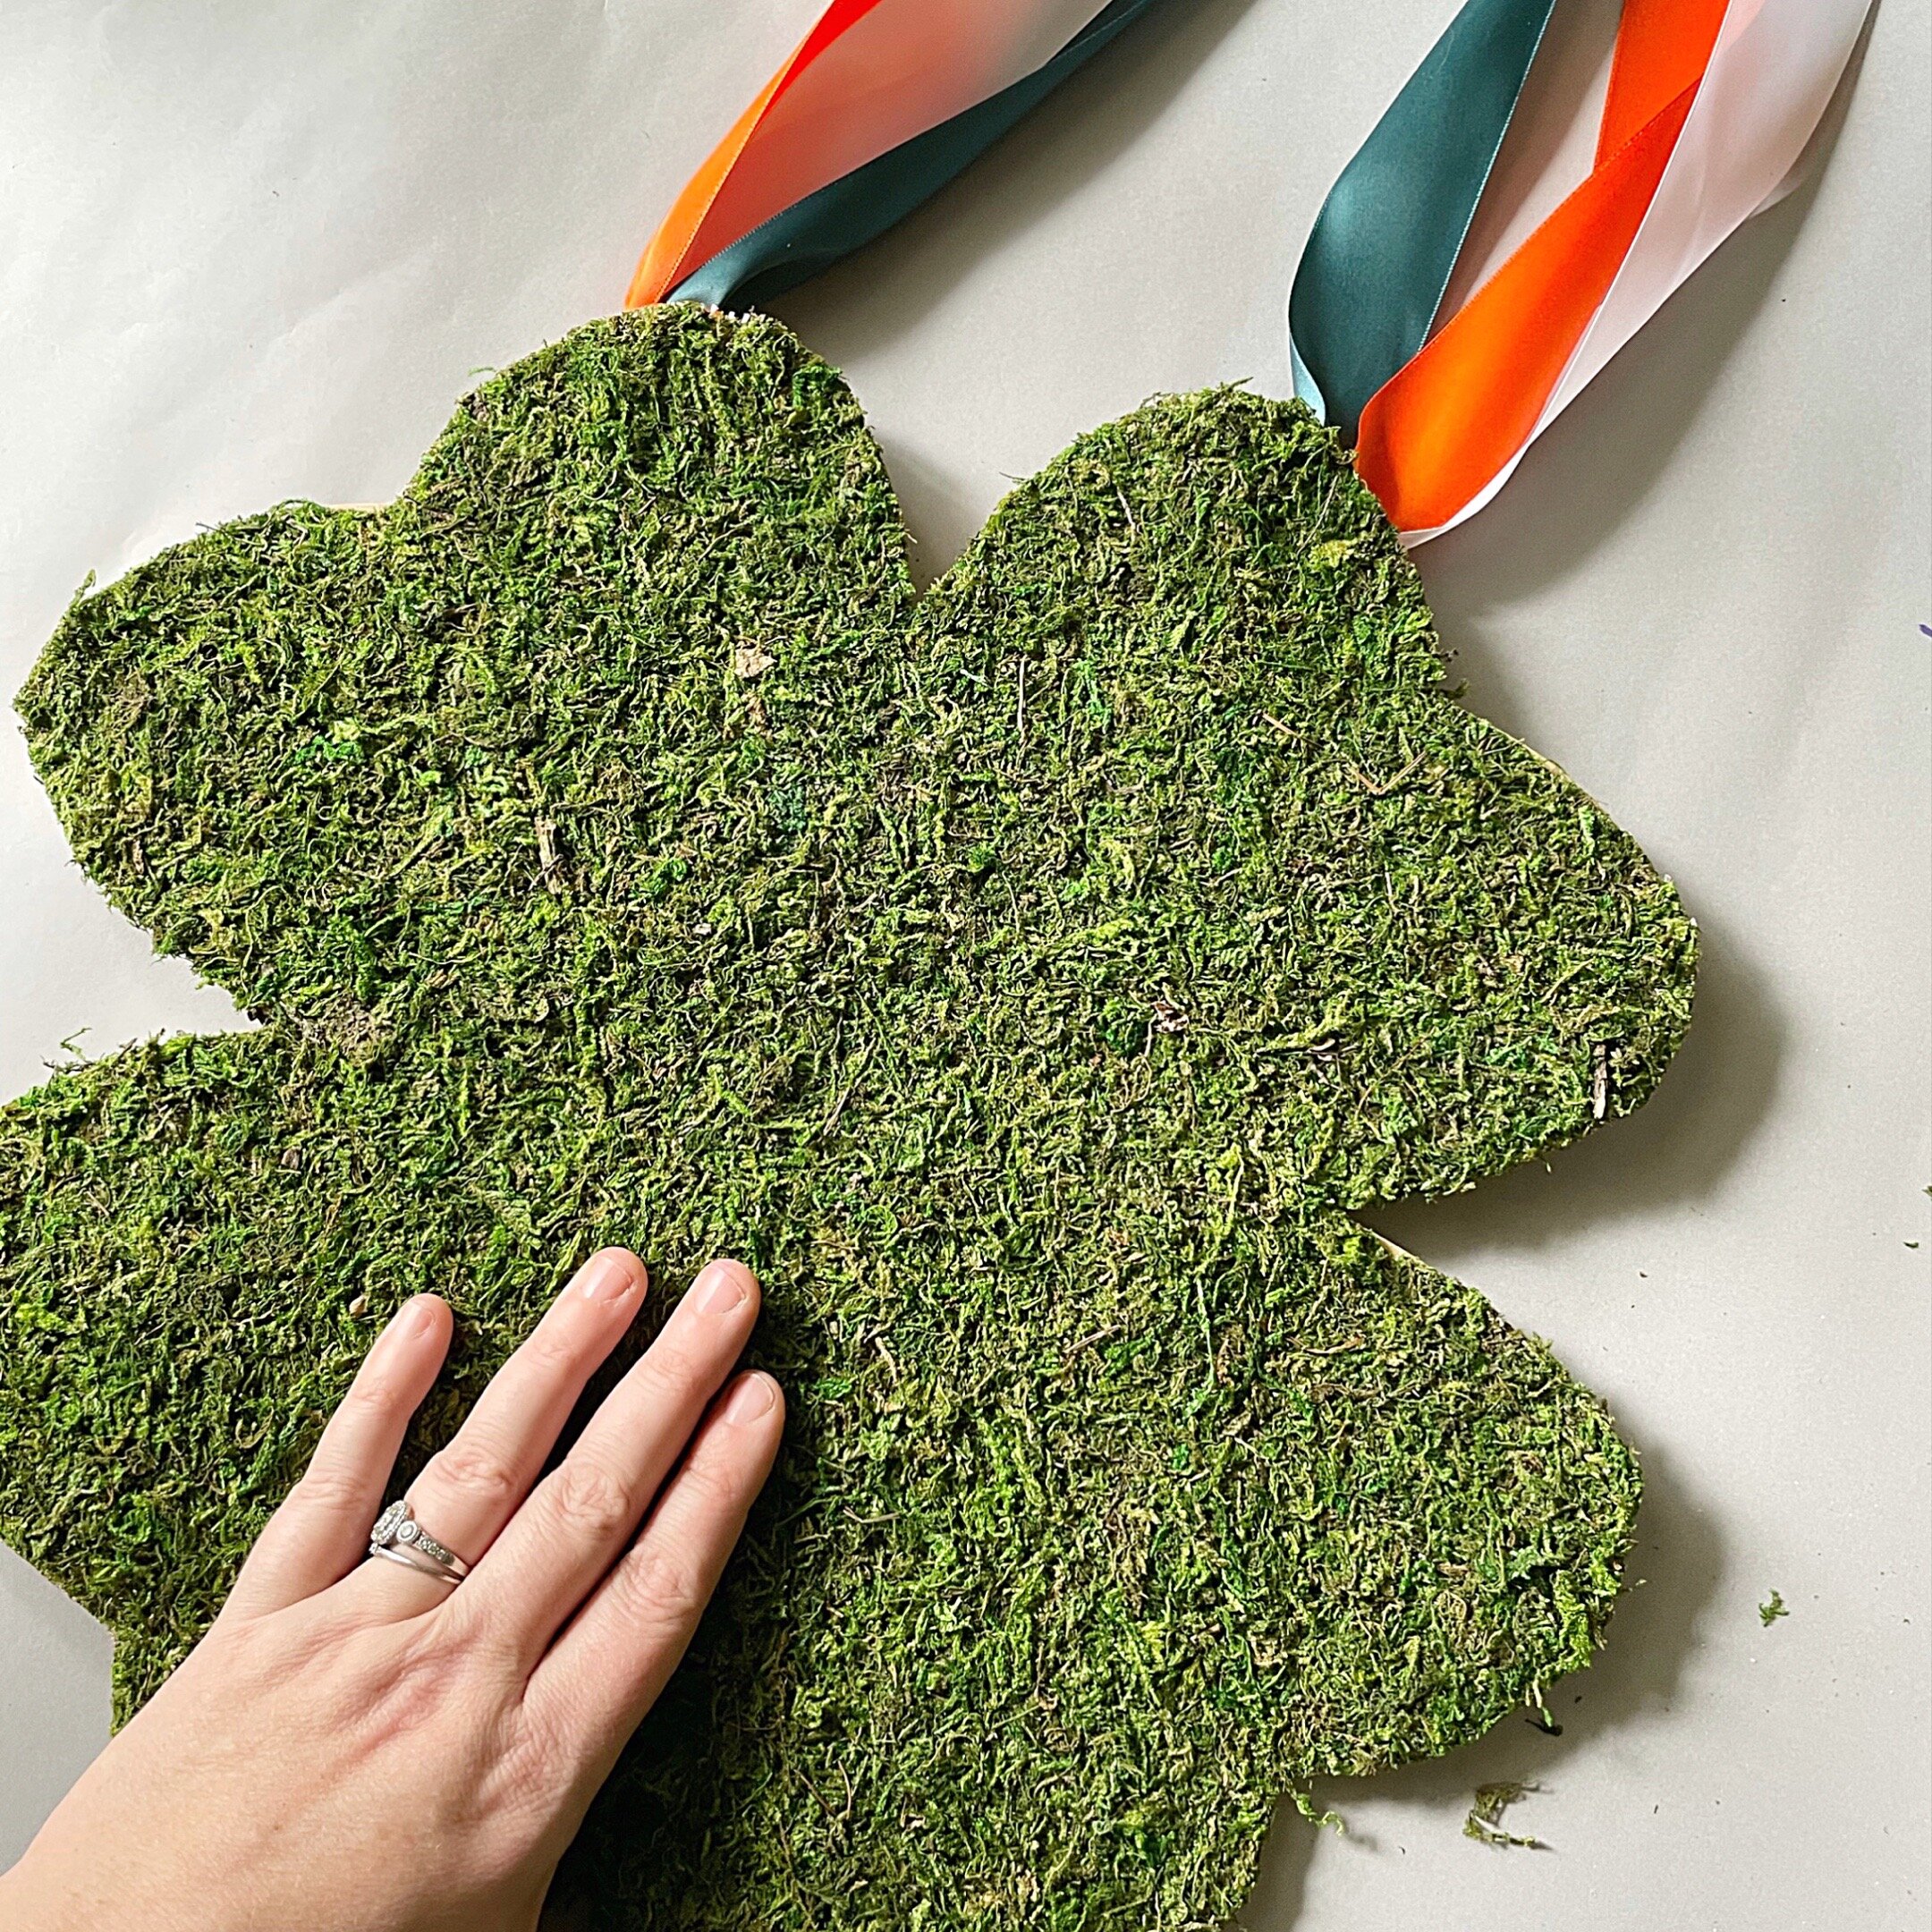
NOTE: Once your ribbons are secure, make sure you have the moss facing the correct direction. You do not want to put the moss over the knots, and the stem has a curve so you need to pay attention to that.
Securing the moss will be a little different for everyone.
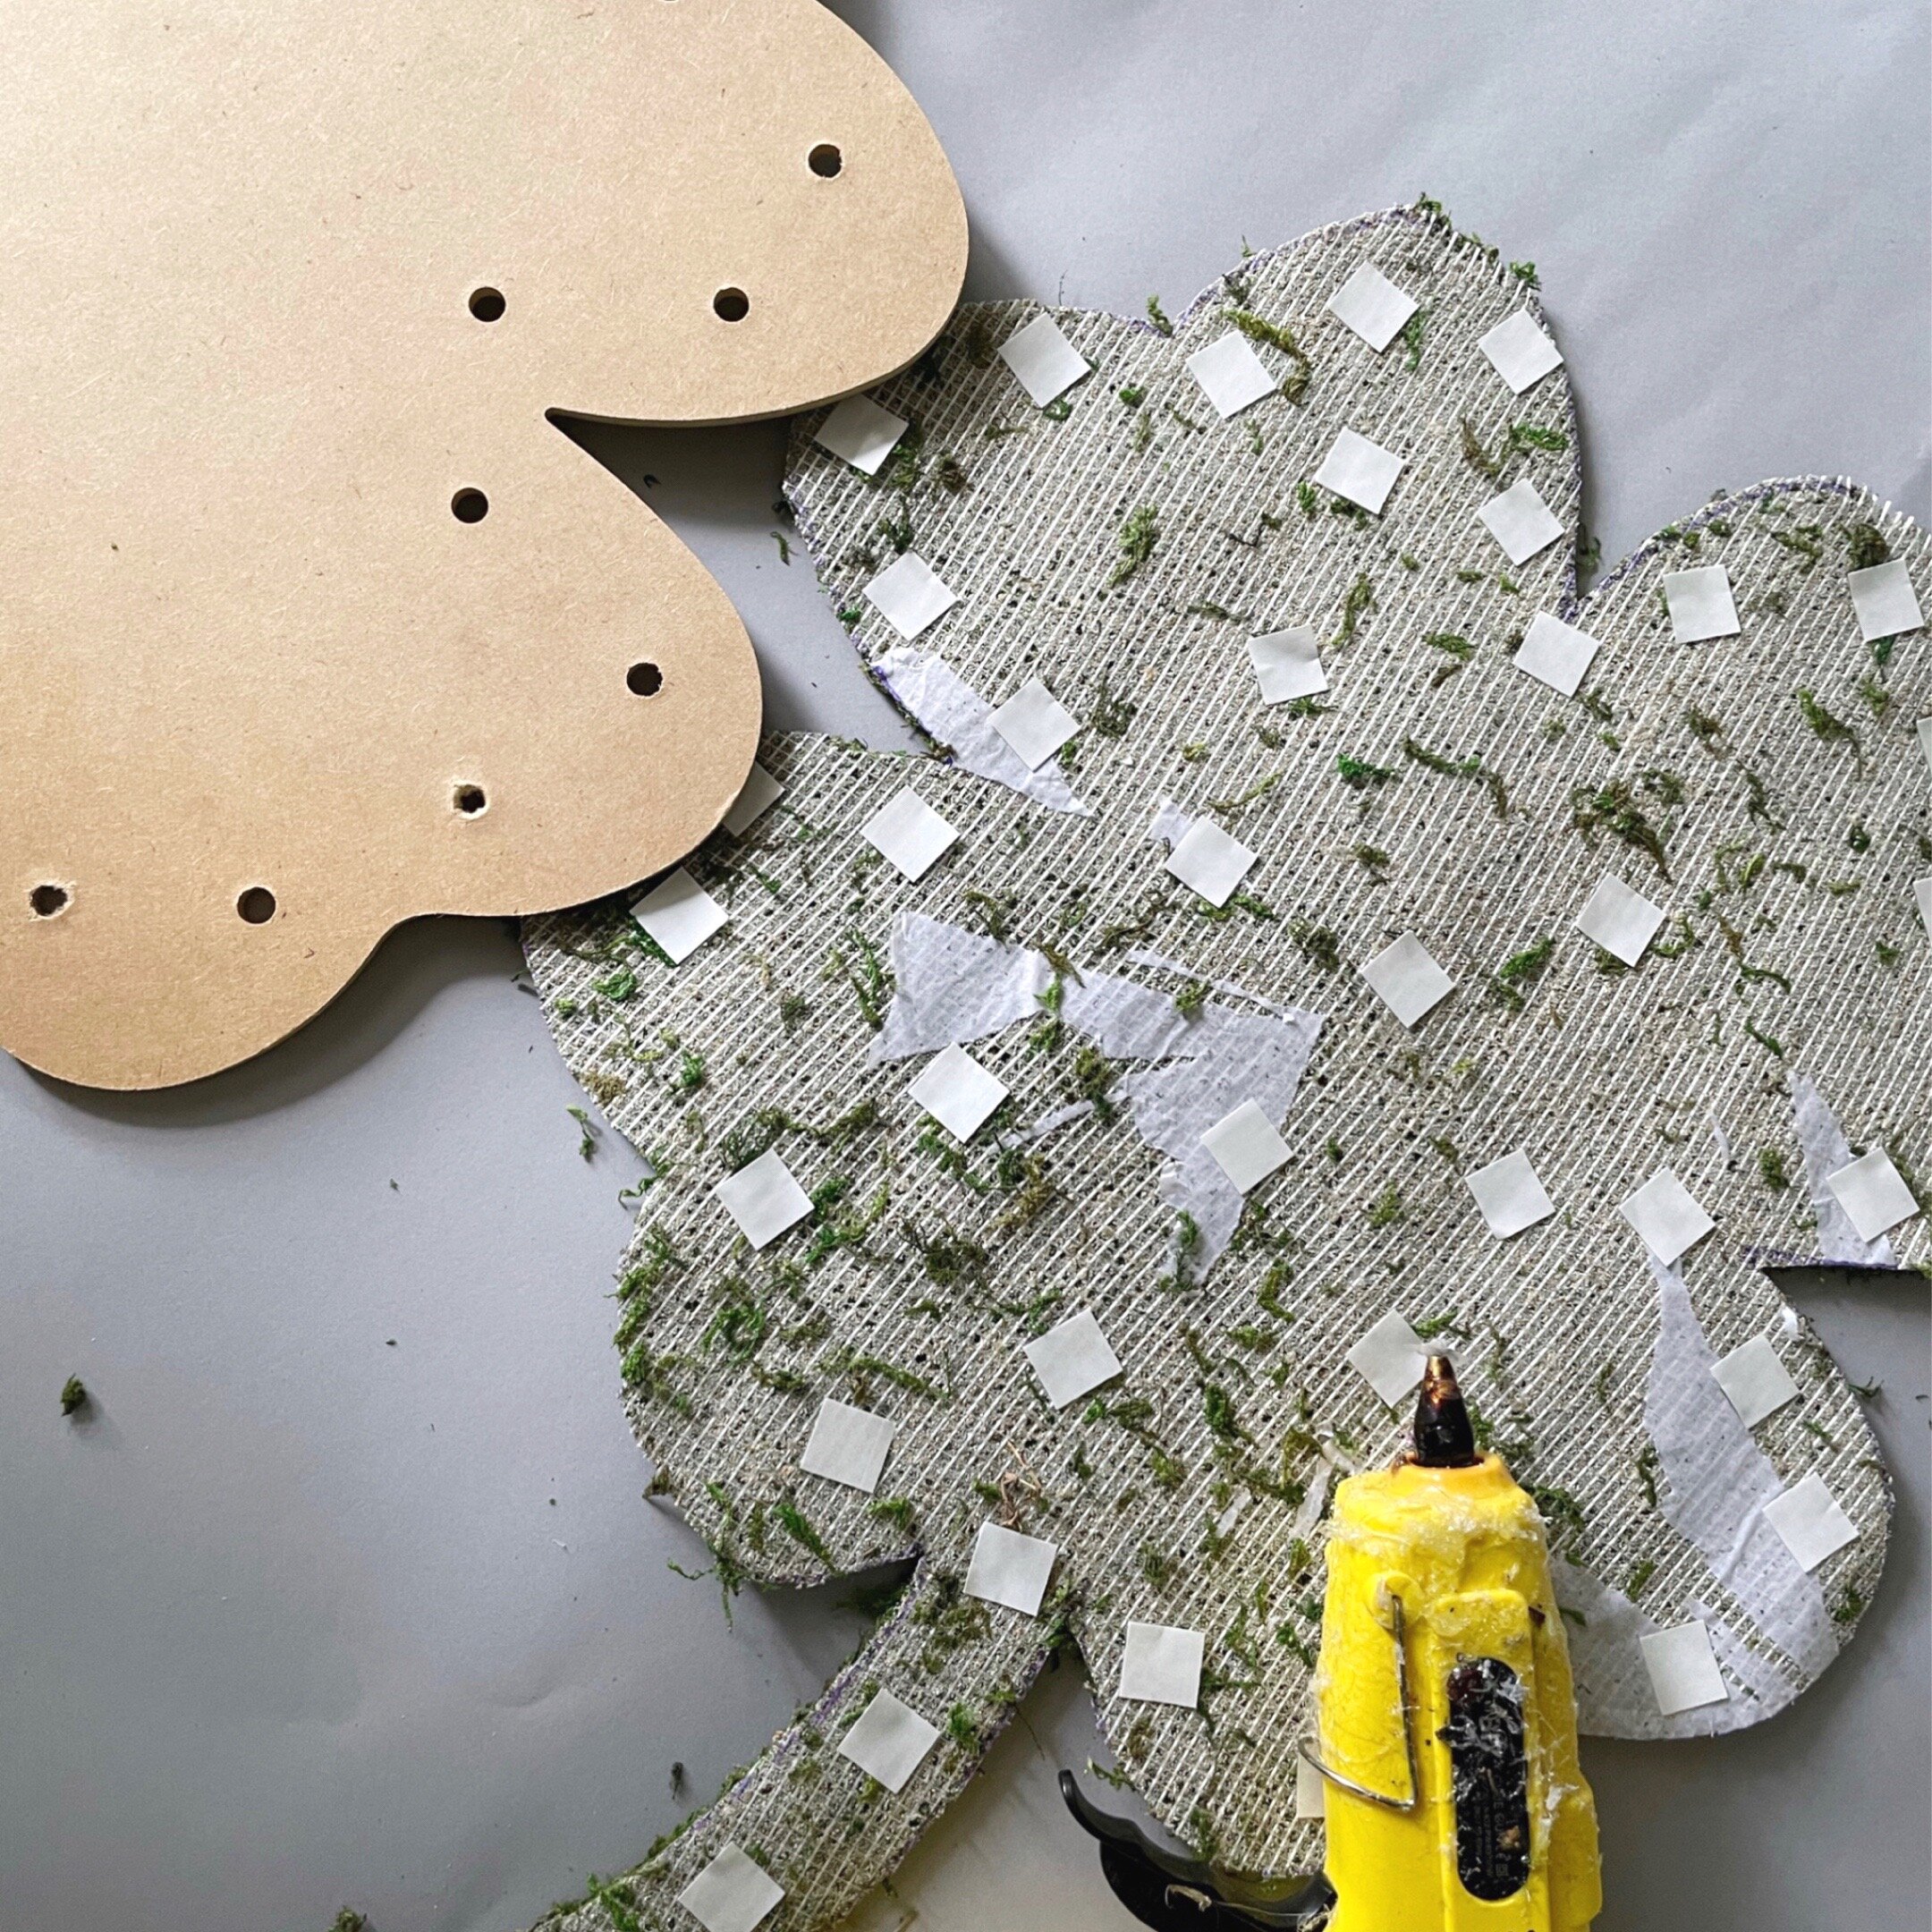
On some the back is already sticky, just peal off the paper layer and press to form. Even with the very sticky moss, you may want to add a few glue dots to the stem for extra security.
If your moss is not sticky, you have a few options. A glue gun, wood glue or glue dots. The glue dots are included in this kit, so go ahead and cove the back of your moss with them. Place them close to the edge, paying particular attention to the top.
Once all the glue dots are in place, peal off the back layer, and gently press down to your form.
Repeat this step on the back with the felt. This side needs only about half as many dots as the front, but do make sure to place some glue dots on top of the ribbon knots to secure the felt to it.
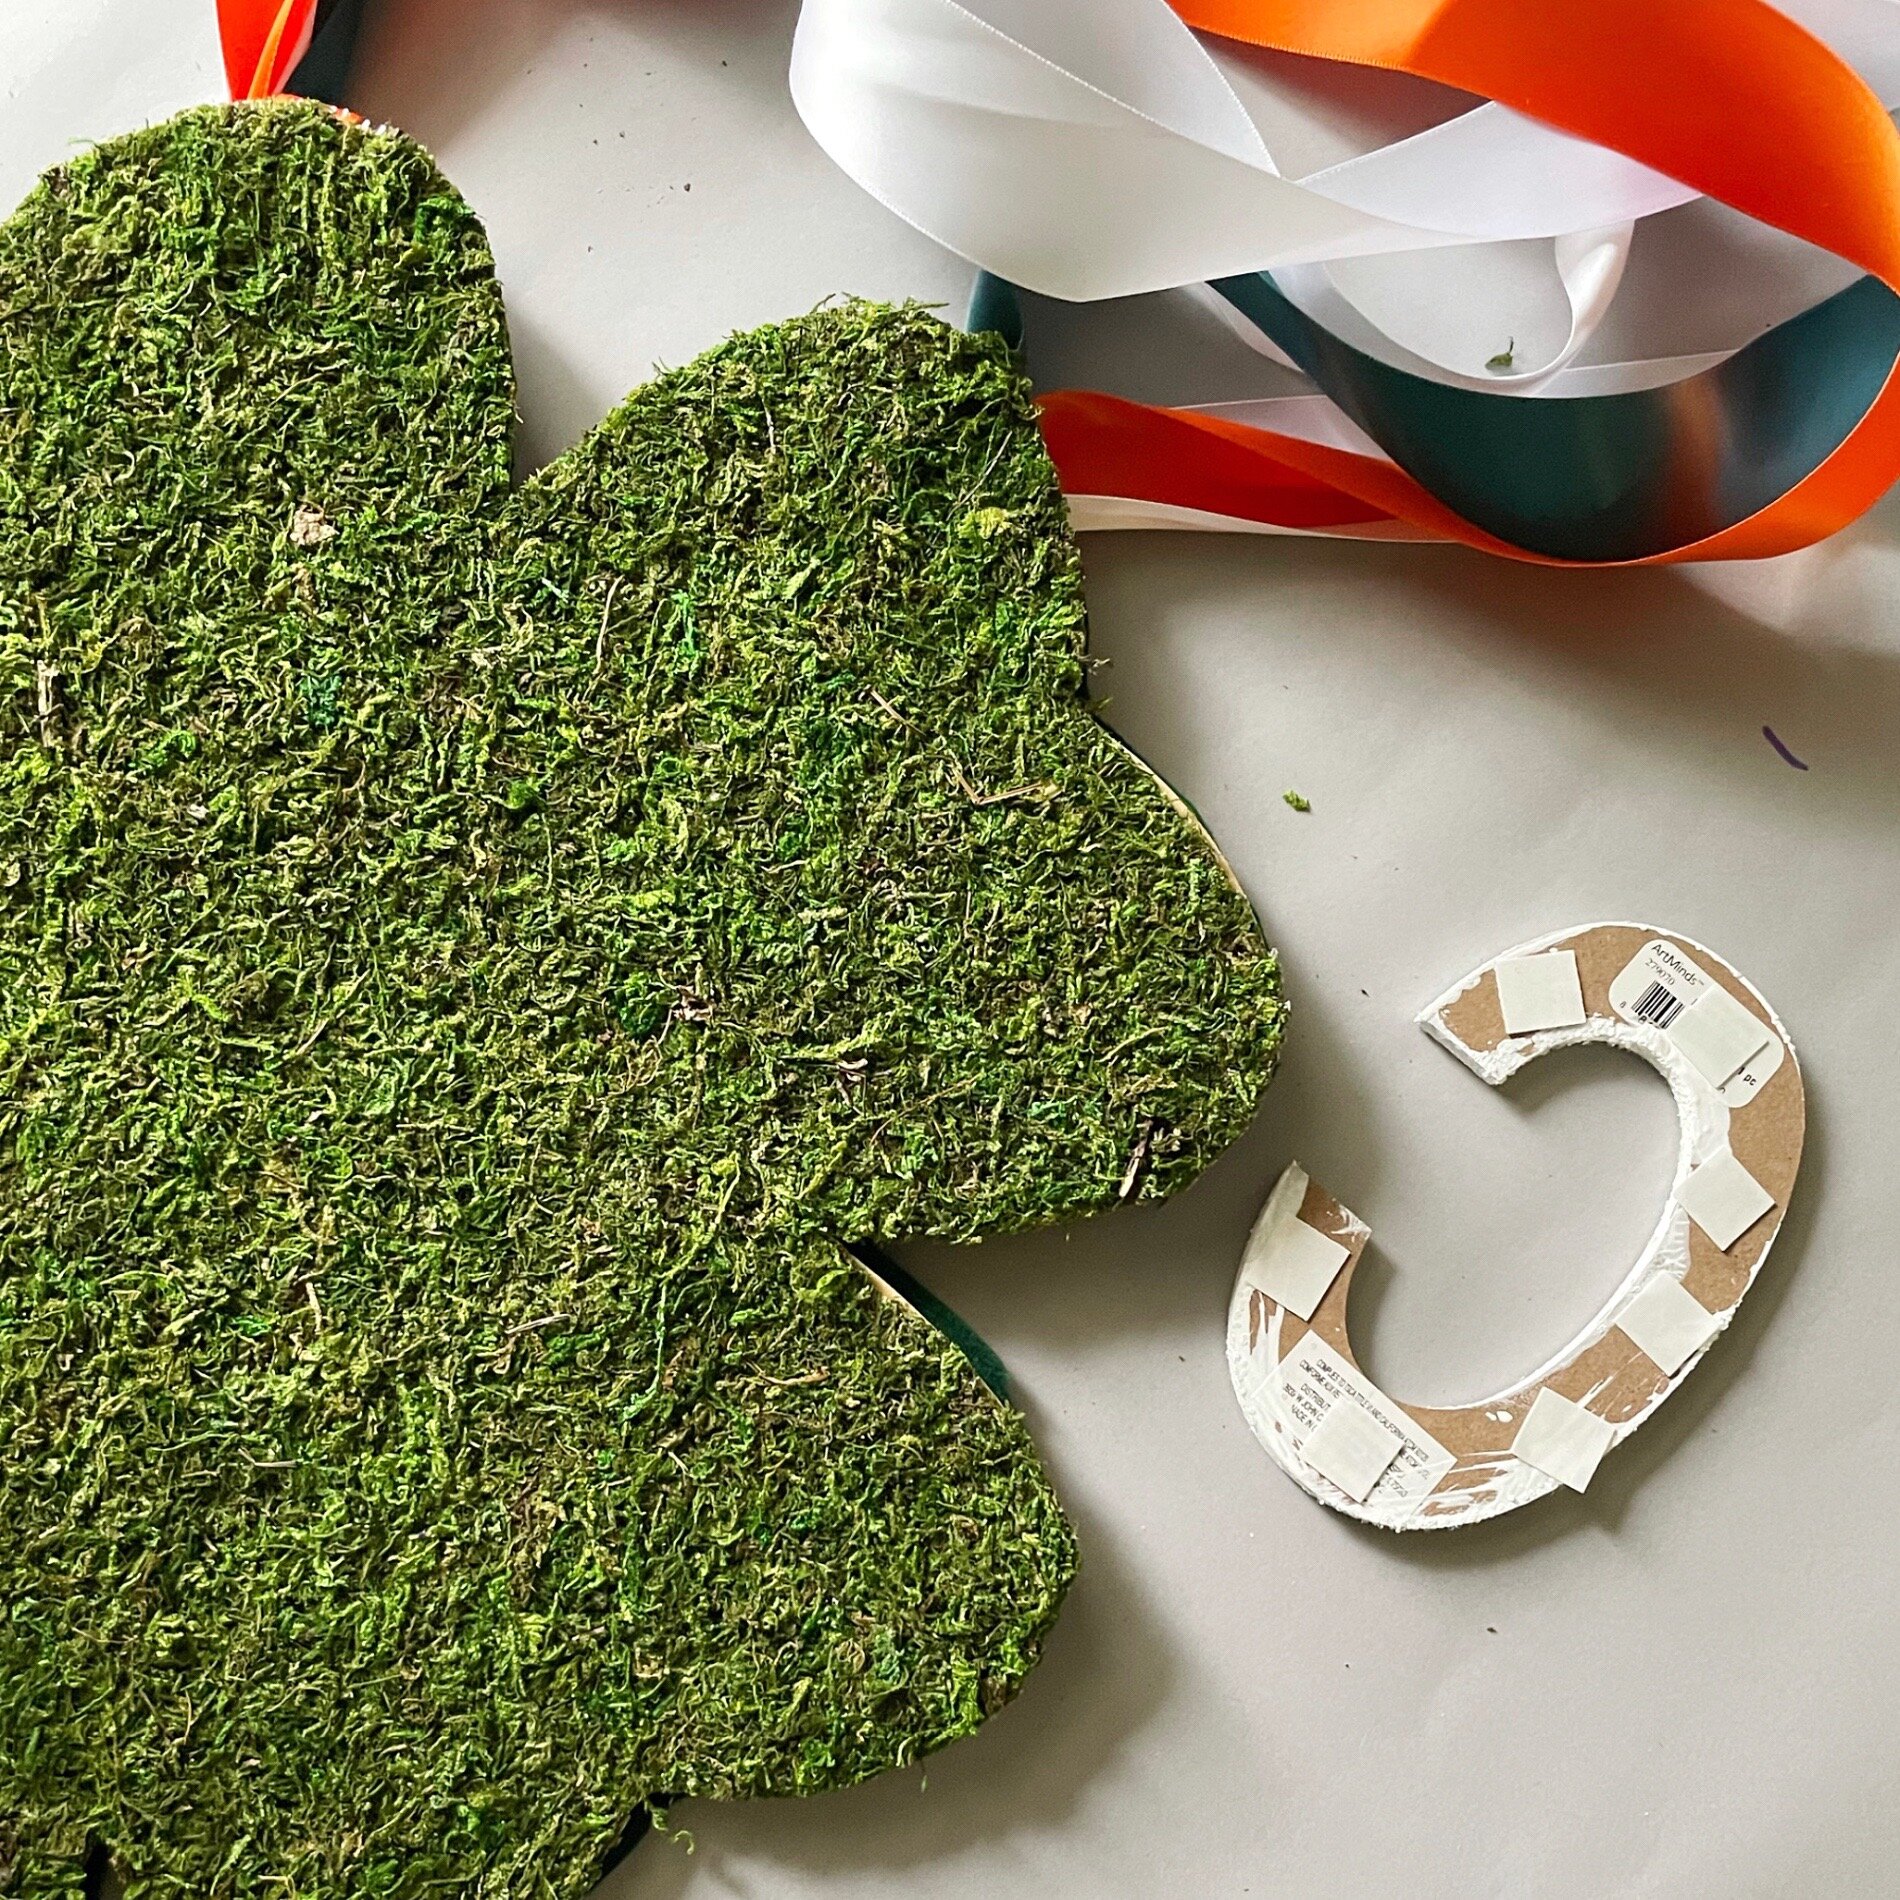
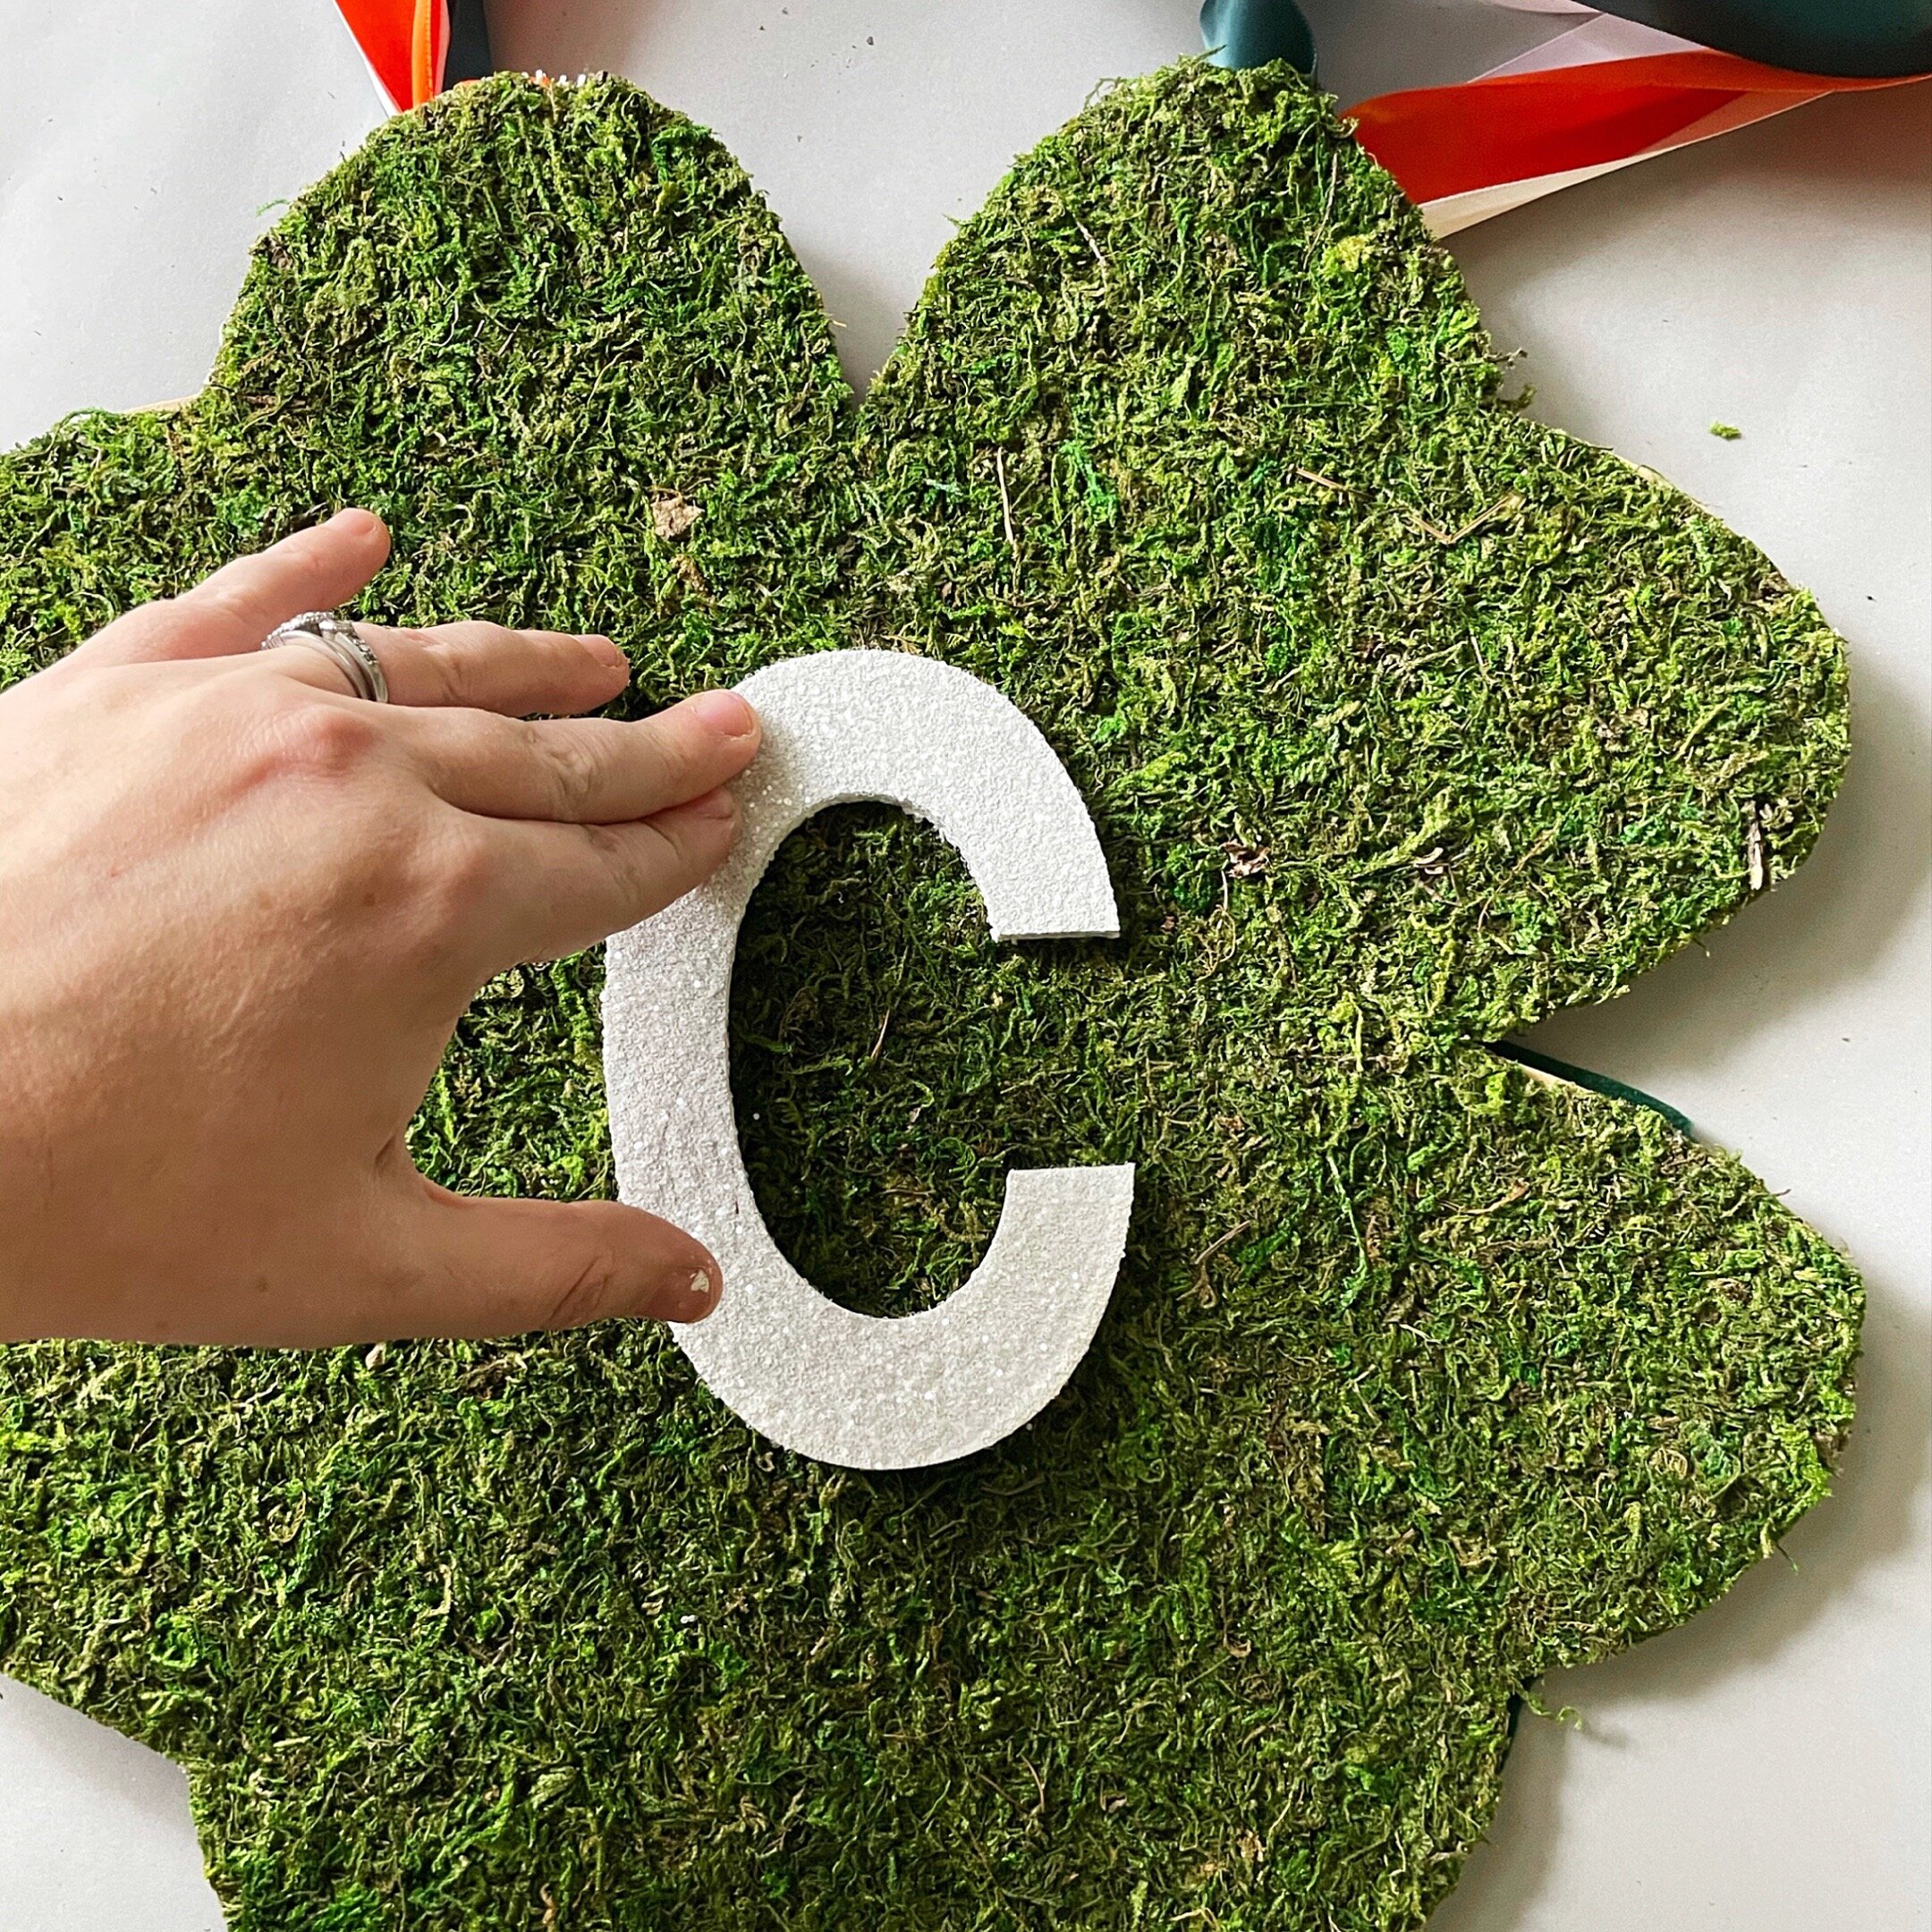
Now, if your letter is already dry, its time to fix it to the center. Place glue dots on the back of the letter and peal away their backing. Gently find the center of the shamrock, and once it looks good, press down very firmly.
Let everything bond together for a few hours before hanging. You can place some heavy books on top if you want to be extra sure.
Finally, pull the ribbons together in the middle, and cut at the halfway point. You are now ready to hang your shamrock. Depending on placement, you will either be able to make a bow or just tie in a double knot.
Thank you for trying this DIY and I hope you find a big pot of gold!